How To Build a Fully Composable Blog Using Webflow
Discover how we recreated the flexibility of WordPress with Webflow’s dynamic CMS to create a scalable, customizable blog for a client. Learn about our hybrid approach, including CMS collections, reusable components, page slots, and interactive design elements, to empower unique layouts for every blog post.
Introduction
After successfully designing and developing the new homepage for CompensationIQ, I conducted a one-week handoff during which I guided the Qlearsite team on how to manage and update the website themselves.

They were impressed with the work and, importantly, with Webflow’s intuitive interface. These two factors combined were enough to convince them to migrate their entire online presence to Webflow. Consequently, I decided to begin by creating a new design for their blog that aligned with the new design direction and implemented it once again in Webflow.
However, there was a problem. Coming from WordPress's Elementor, they were accustomed to its editor's ability to custom combine blocks to produce entirely unique content arrangements for each blog post. In contrast, with Webflow, once you create the design/layout for the blog post page, every blog post must follow that arrangement/structure/layout.
Let me give you an example: say you design your blog post in Webflow with this layout structure:
Heading - Body text - Quote block - Image block - Body text - Carousel block
But one day, you need to make a blog post with the structure:
Heading - Carousel block - Body text - Heading - Image block - Body text - Quote block
You simply cannot achieve this in Webflow (by default).
The question became: How do I replicate Elementor's block-building experience in Webflow for the Qlearsite team? How do I bring the perks of WordPress and combine them with the innate benefits of Webflow?

After a lot of ideation, I came up with a way to build a dynamic blog system that combined WordPress's blogging flexibility with Webflow’s unique strengths.
The Solution: A Hybrid Blog Structure
I devised a hybrid approach, combining:
- Webflow CMS for managing consistent parts of a blog post like titles, summaries, and authors.
- A duplicatable blog post page template with page slots where blocks can be added or removed after duplication.
Here’s how I built it step by step:
Step 1: Setting Up CMS Collections
I started by creating three core CMS collections:
- Authors Collection: Stores author details such as name, role, and profile image.
- Categories Collection: Organizes blog posts by topics.
- Blog Posts Collection: Holds essential post data, including: * Title * Summary * Primary Image * Blog Post ID (a unique identifier for filtering the hero section of each blog post to show the correct post details) * Blog Post Page Link (to be filled after page creation)
The Blog Posts collection references the Authors and Categories collections, ensuring data consistency and scalability. This setup dynamically feeds data into blog cards on the homepage and related posts sections.
Step 2: Building Out the Blog Post Template
With the CMS collections ready, the next step was to build out the blog page template I designed in Figma. The design included:
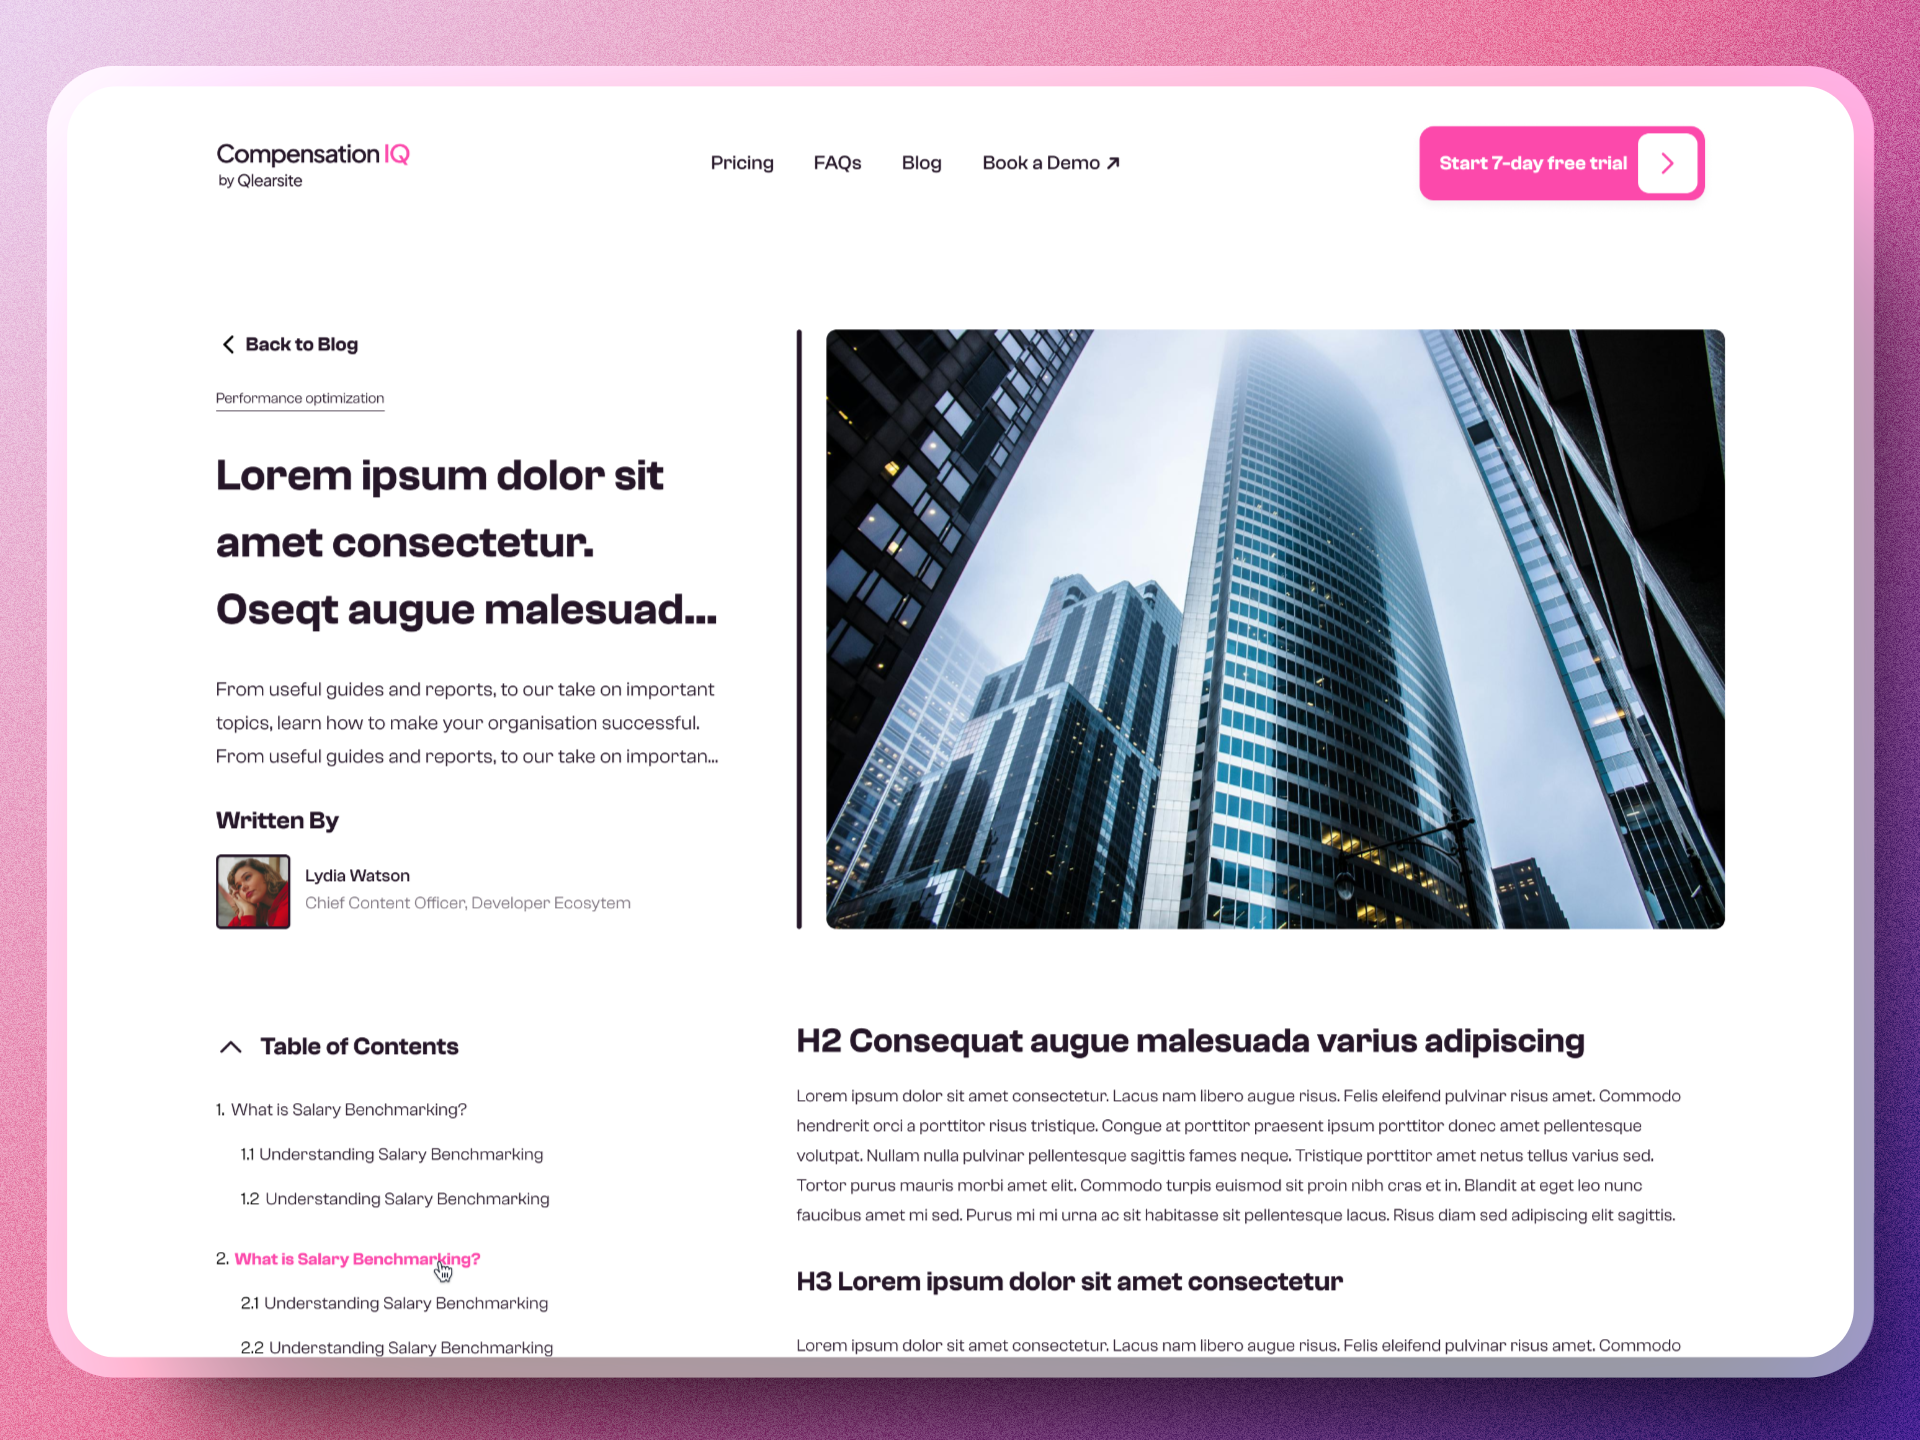
- A hero section: Dynamically displays the blog title, summary, and featured image from the CMS.
- A sidebar: Shows author details and related posts.
- A content section: Allows flexible ordering of elements like text, images, quotes, or videos.
- A footer CTA: Encourages readers to engage further.

After building the template, I realized that to ensure consistency and efficiently push new changes across all the duplicates of that page template, I needed to convert all parts that weren't the content area (where blocks would be slotted in) into components. So, I did that. I converted into components:
- The hero section (blog post title, summary, featured image, category, author details).
- The sidebar (table of contents, subscribe form, CTA section).
- The big CTA just before the footer.
- Related posts section (wrapped in a collection list element bound to the Blog Posts CMS collection).
These components were configured to pull data dynamically from the CMS using component properties connected to fields in the collection item, such as:
- Title field
- Post summary field
- Thumbnail field
- Author details (name, role, image)
- CTA graphic
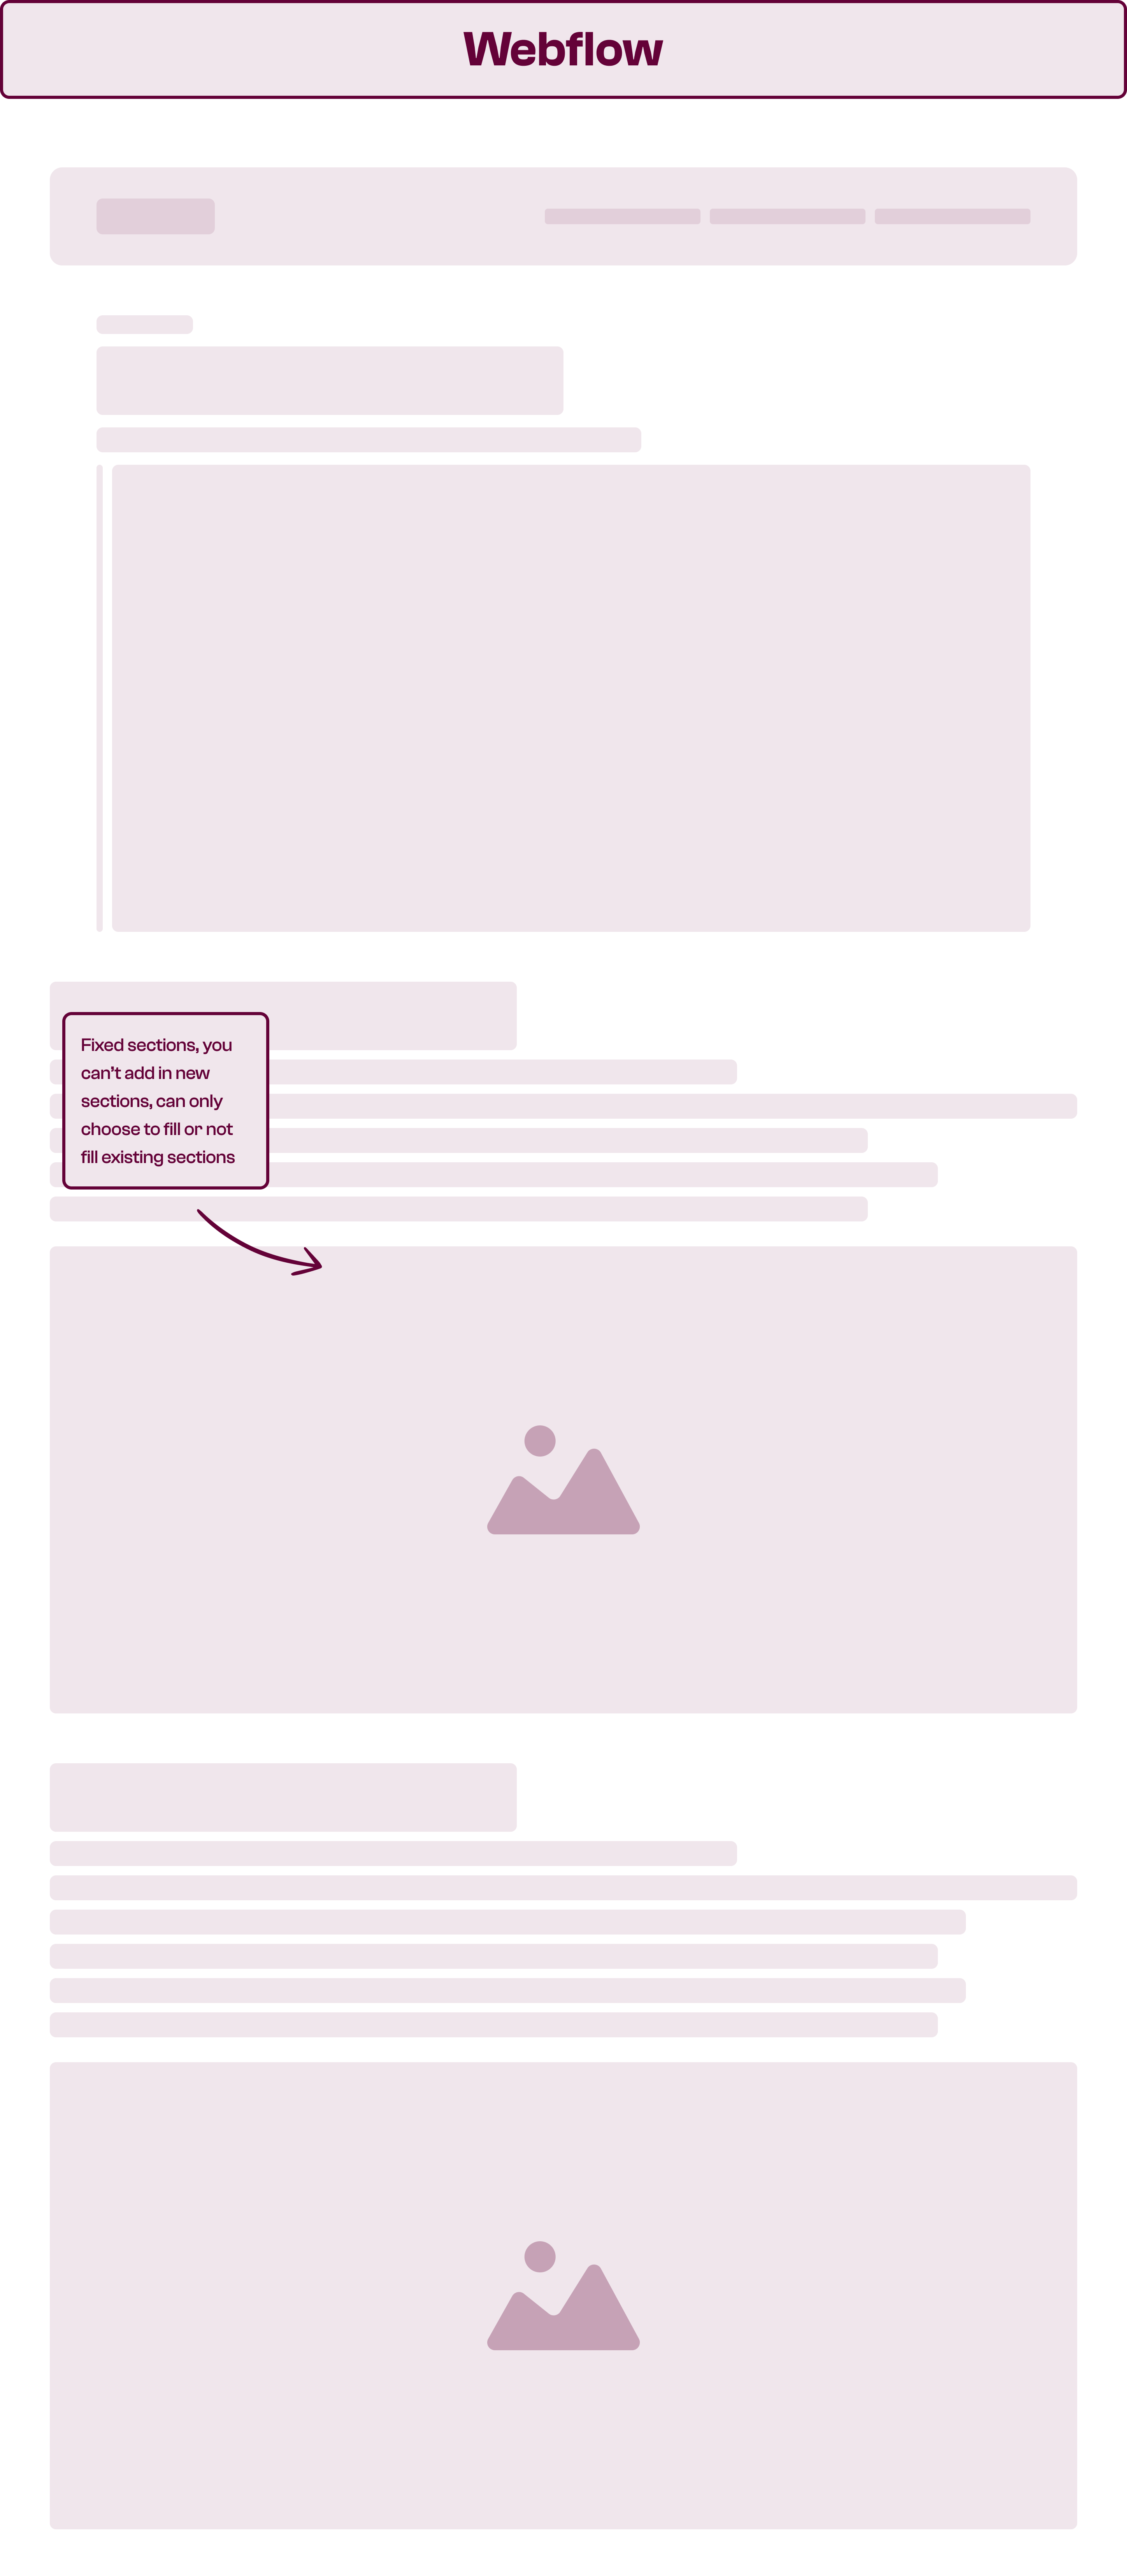
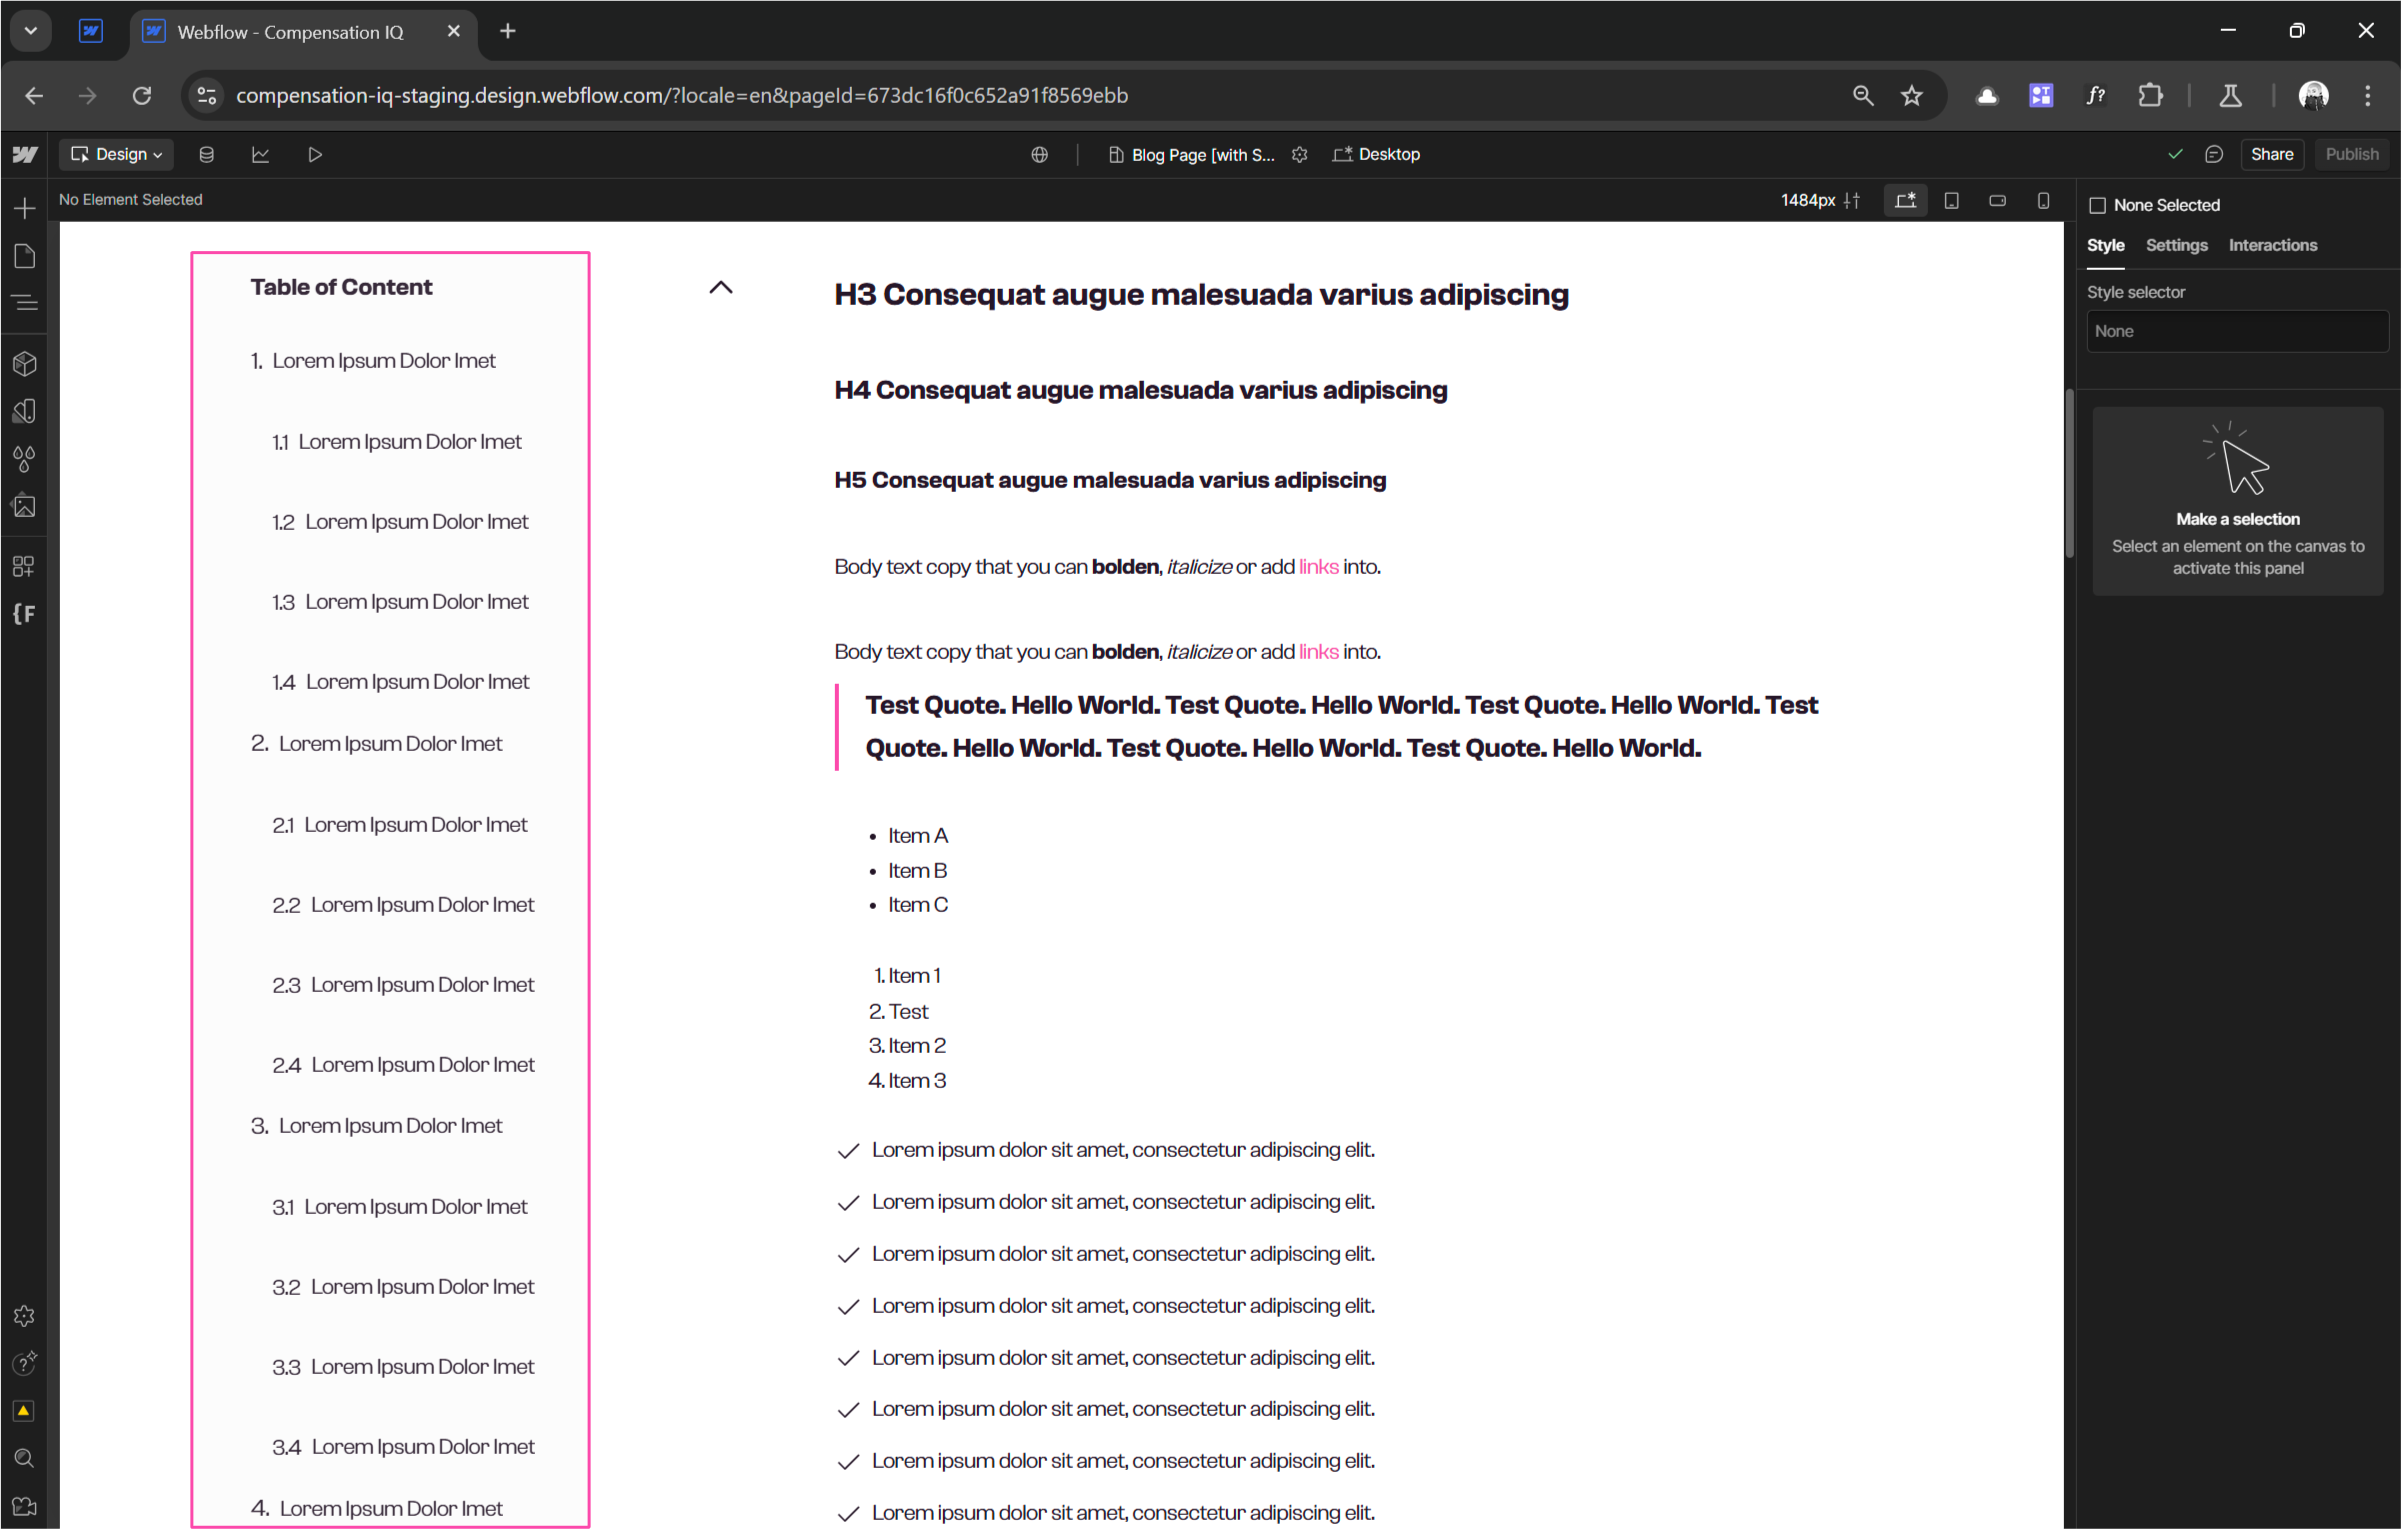
While the table of contents section was to exist on every page, its content was unique for each article. For instance, one article might have Chapter 1 with two sub-sections, 1.1 and 1.2, while another might have sub-chapters 1.1 to 1.4. Therefore, I couldn't connect the table of contents to the CMS. It fell into the category of component blocks (due to its uniqueness in every blog post) but was also fixed in the layout like the hero section (i.e., it would exist on every page compulsorily).
Step 3: Building the Content Area's Component Blocks
Next, I needed to build out the component blocks for the content area, i.e., the elements that will contain the different parts of the article.
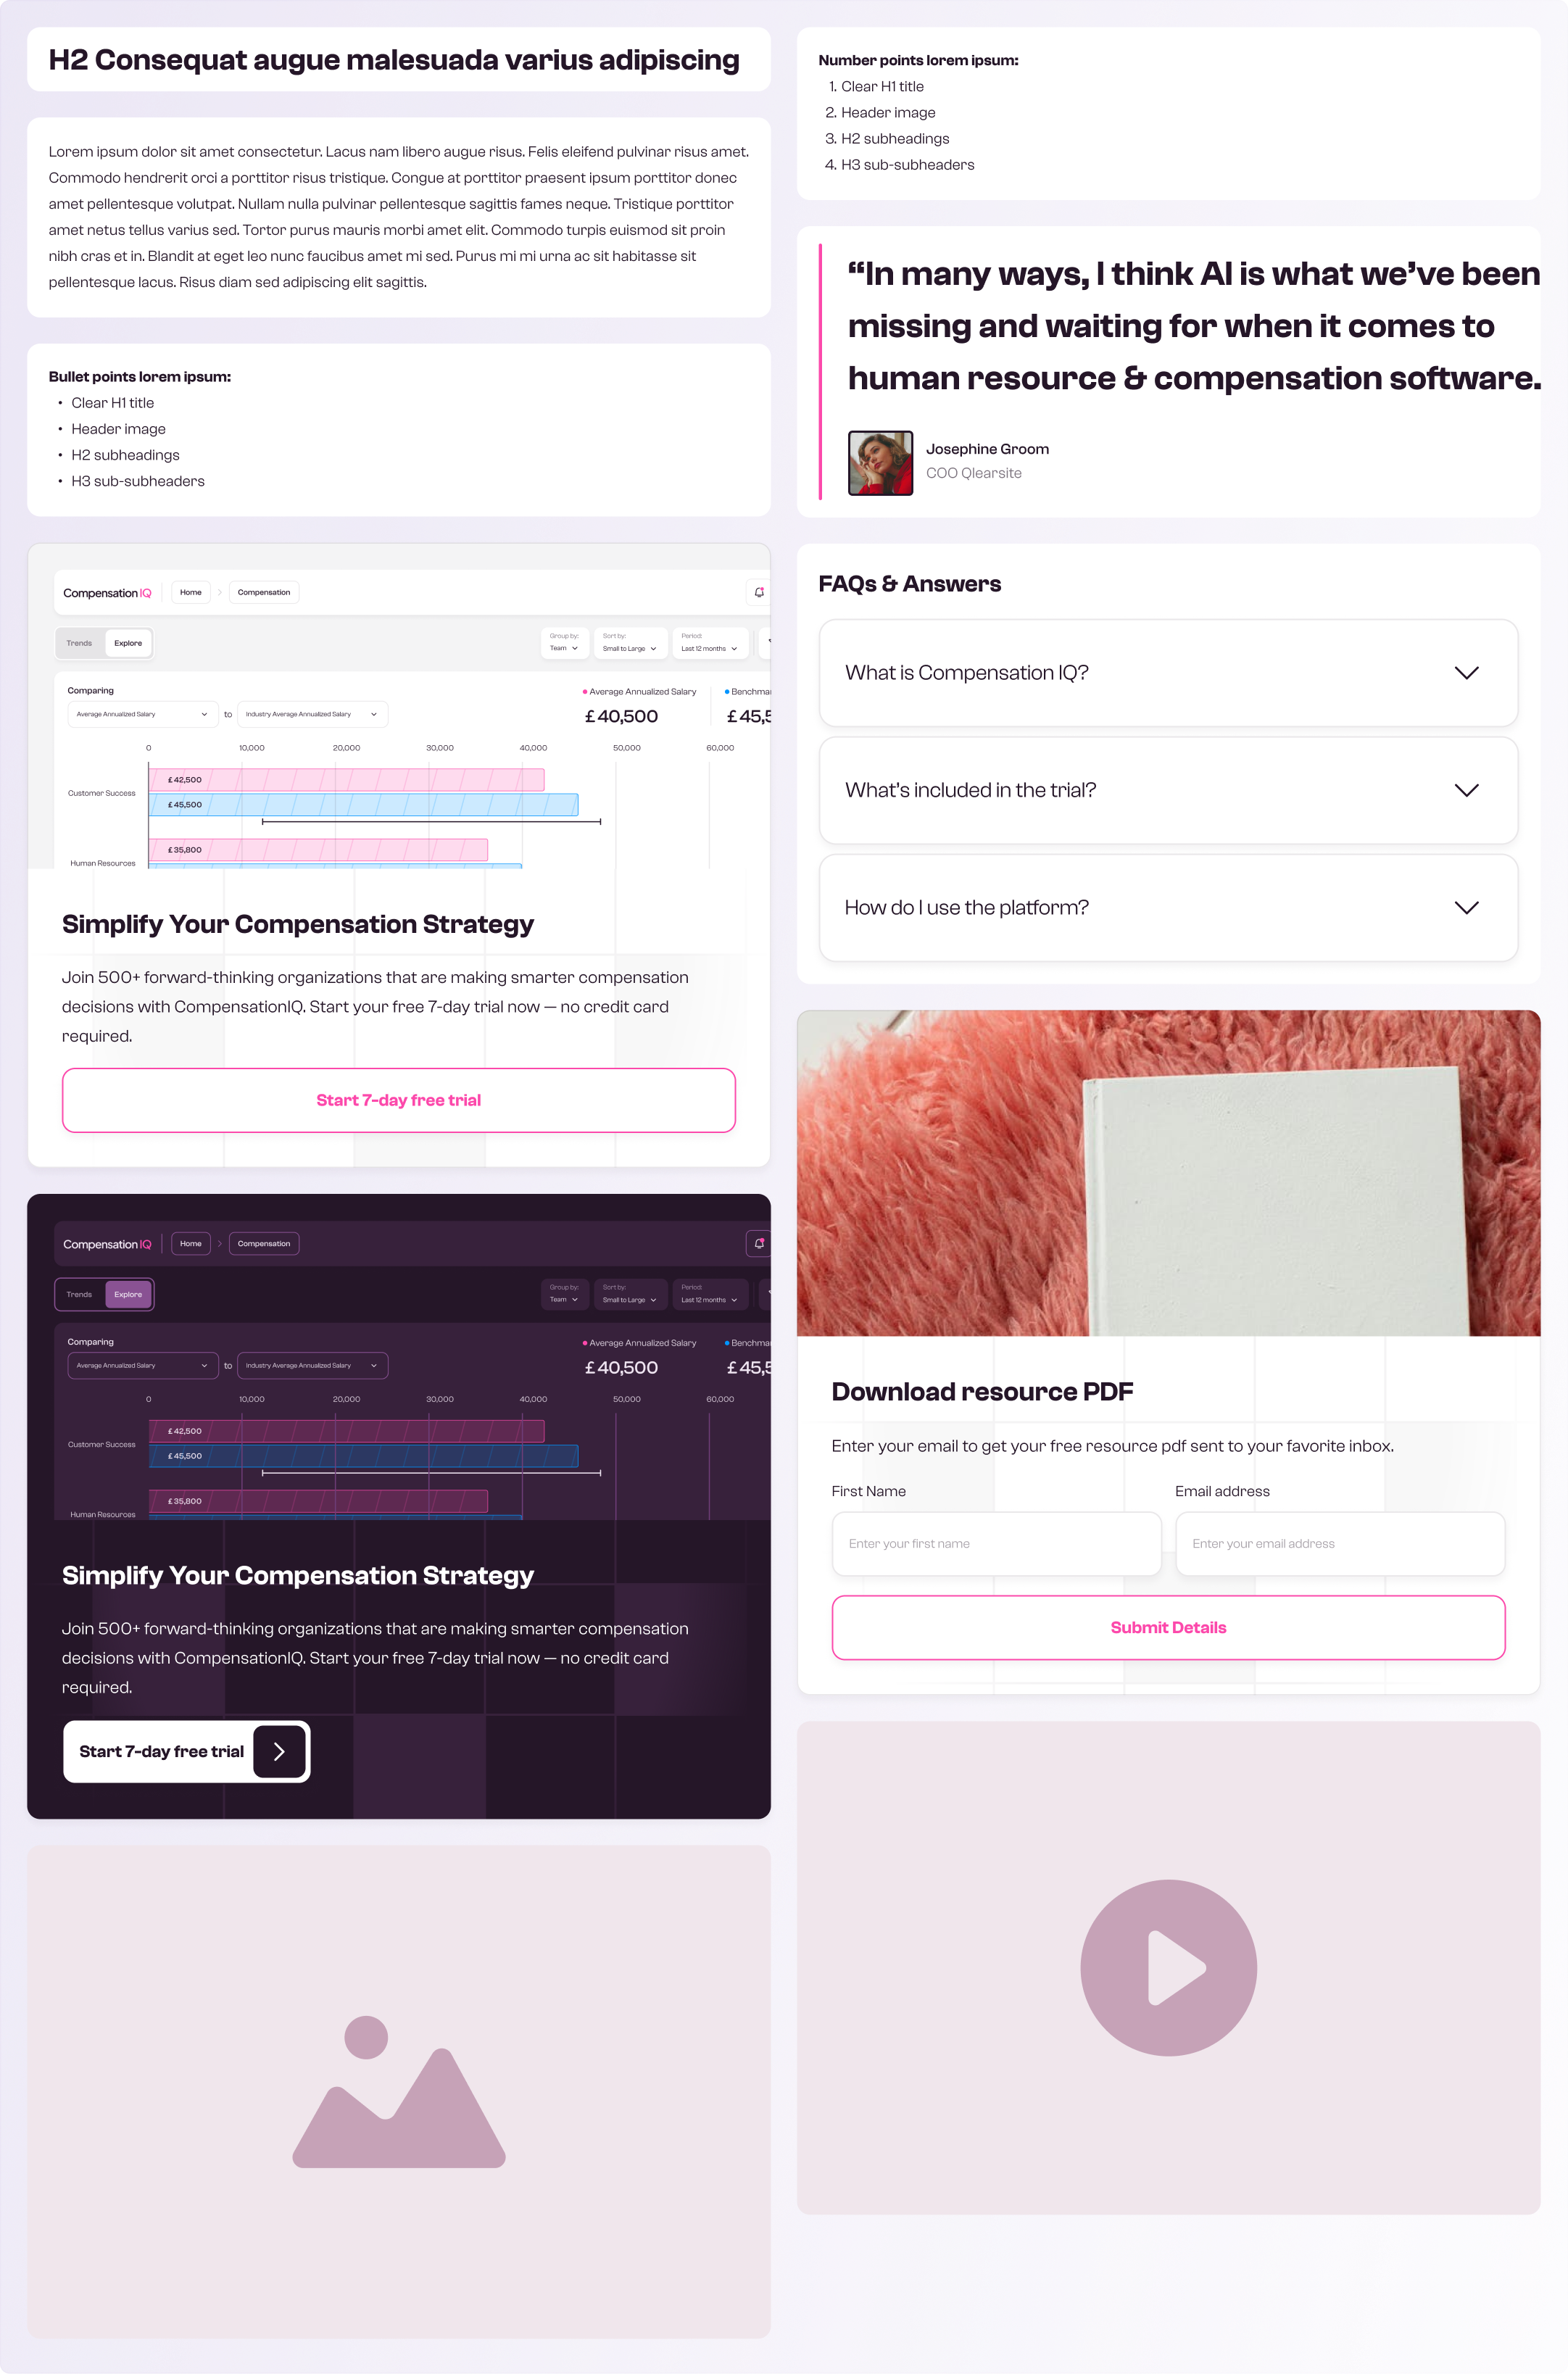
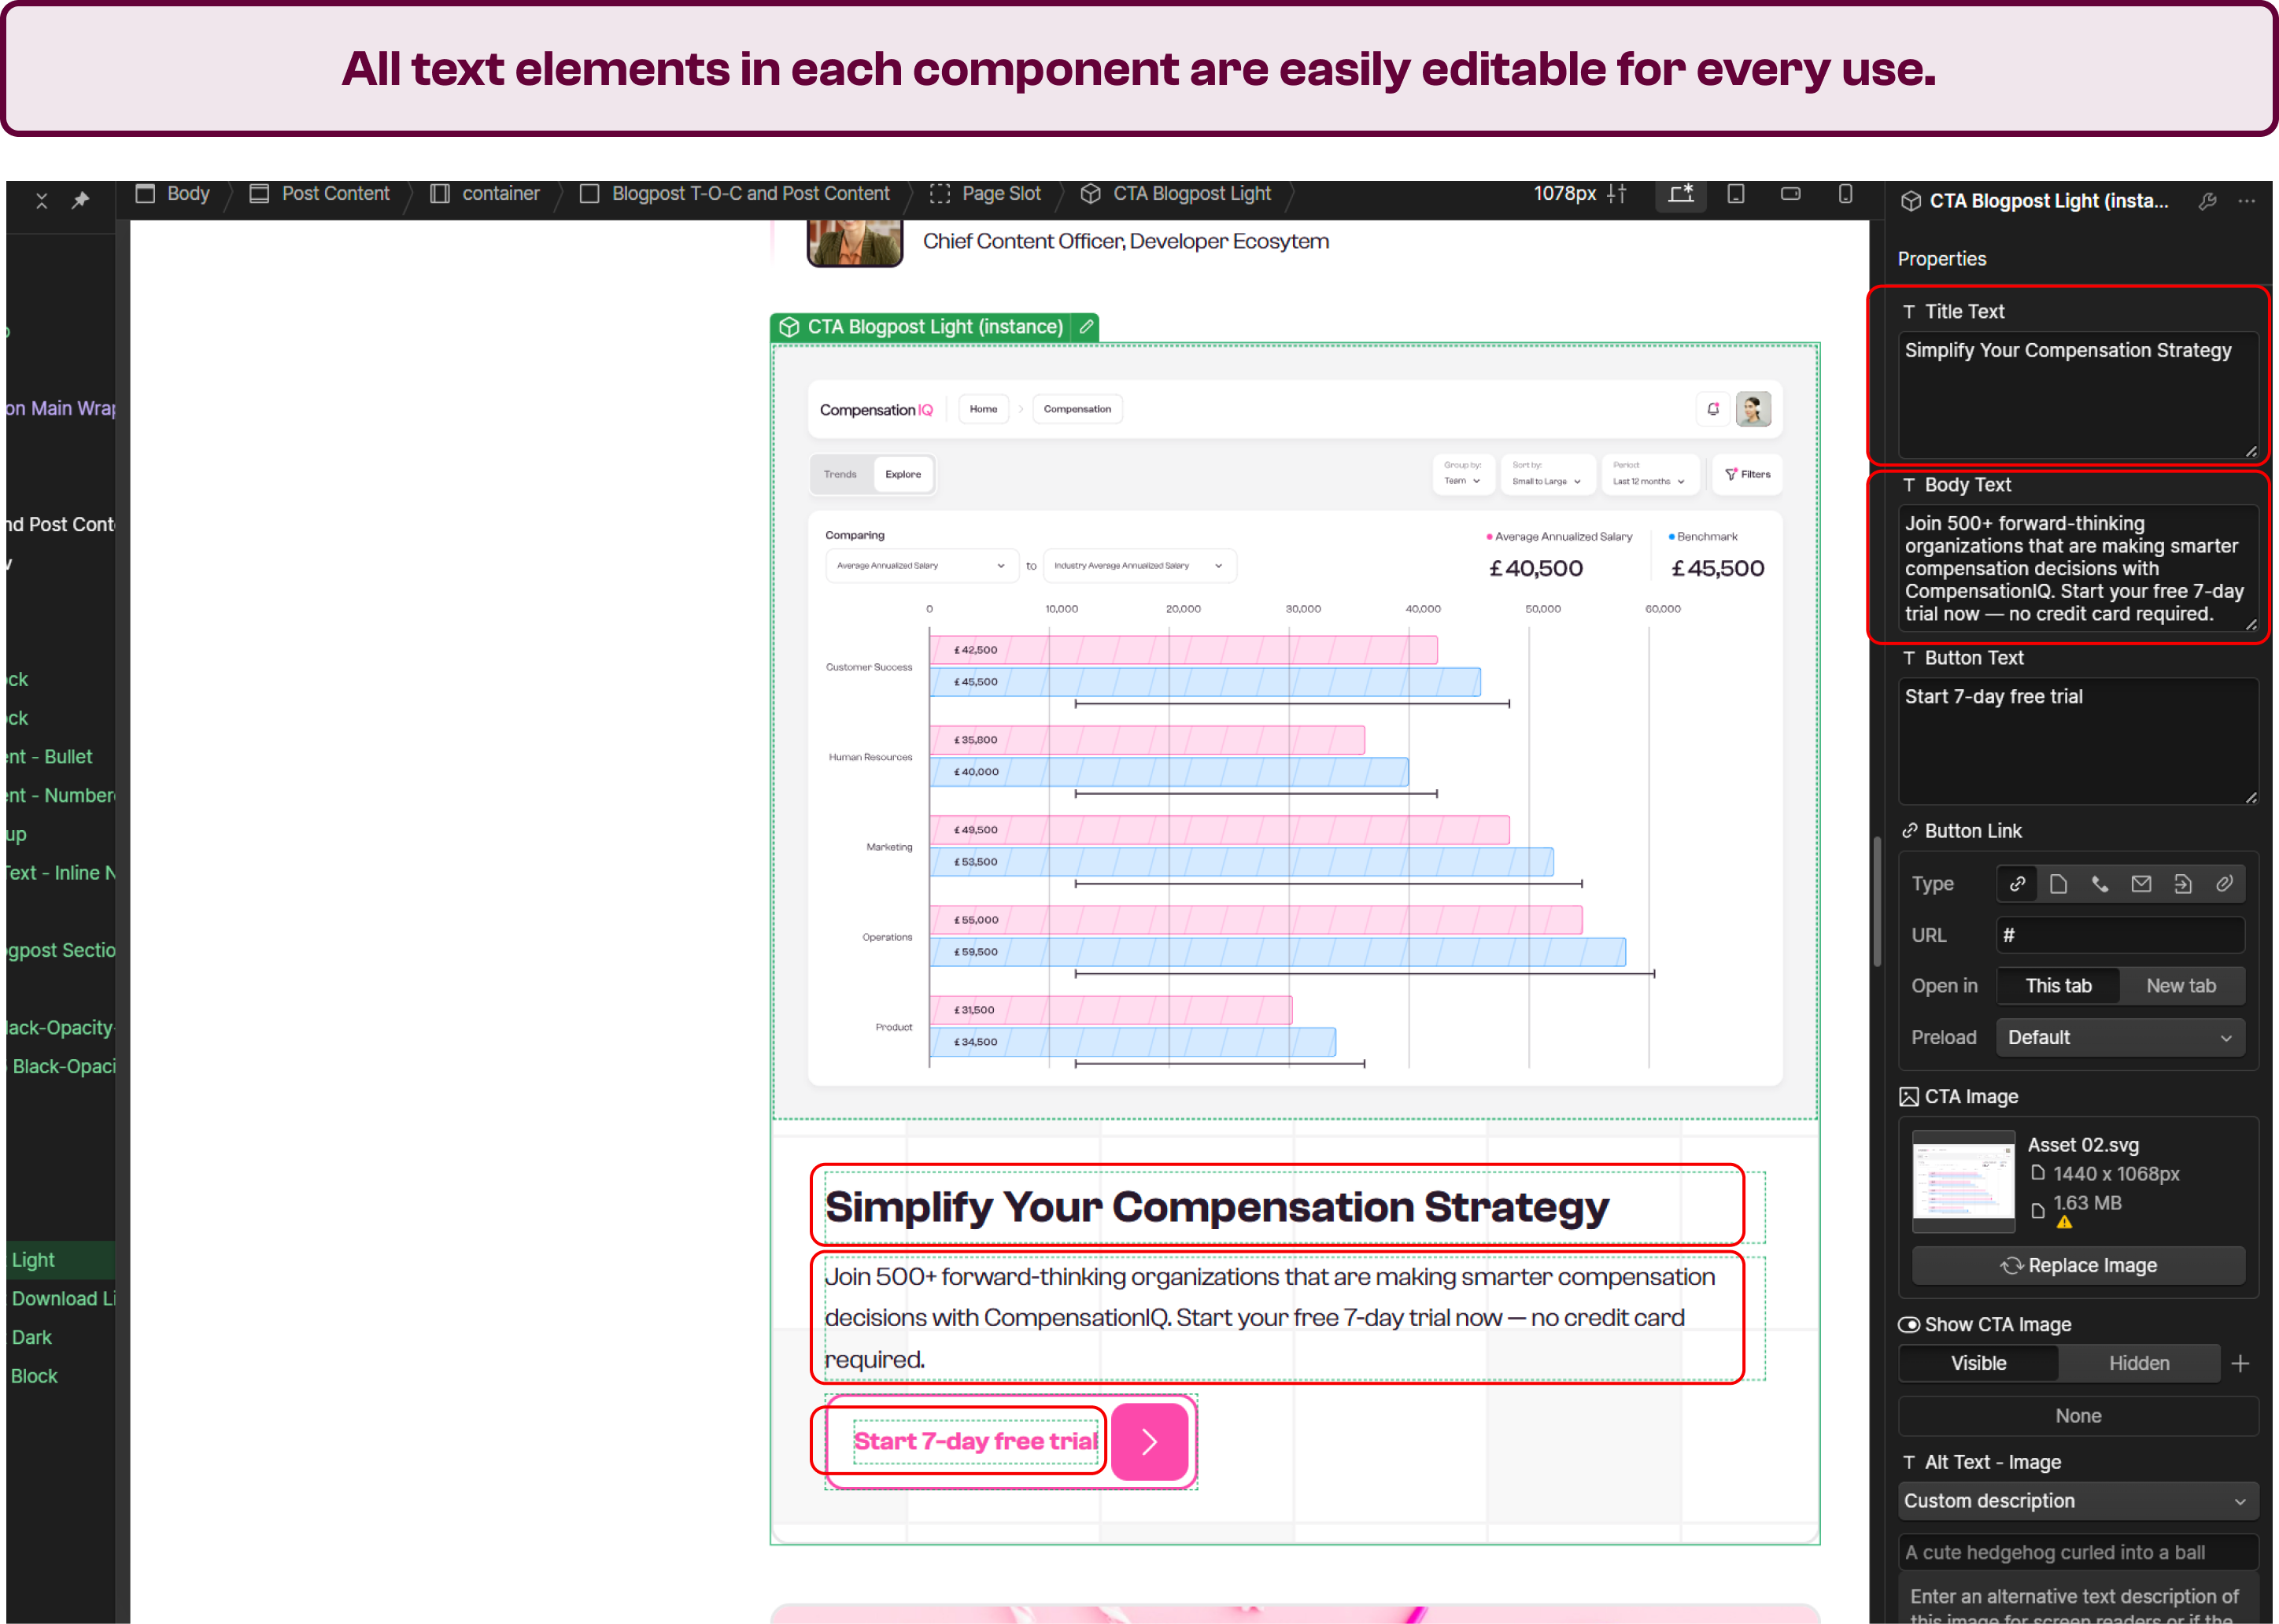
I also added the ability to hide parts of the elements. For example, for the in-post CTA, you could hide the image part.

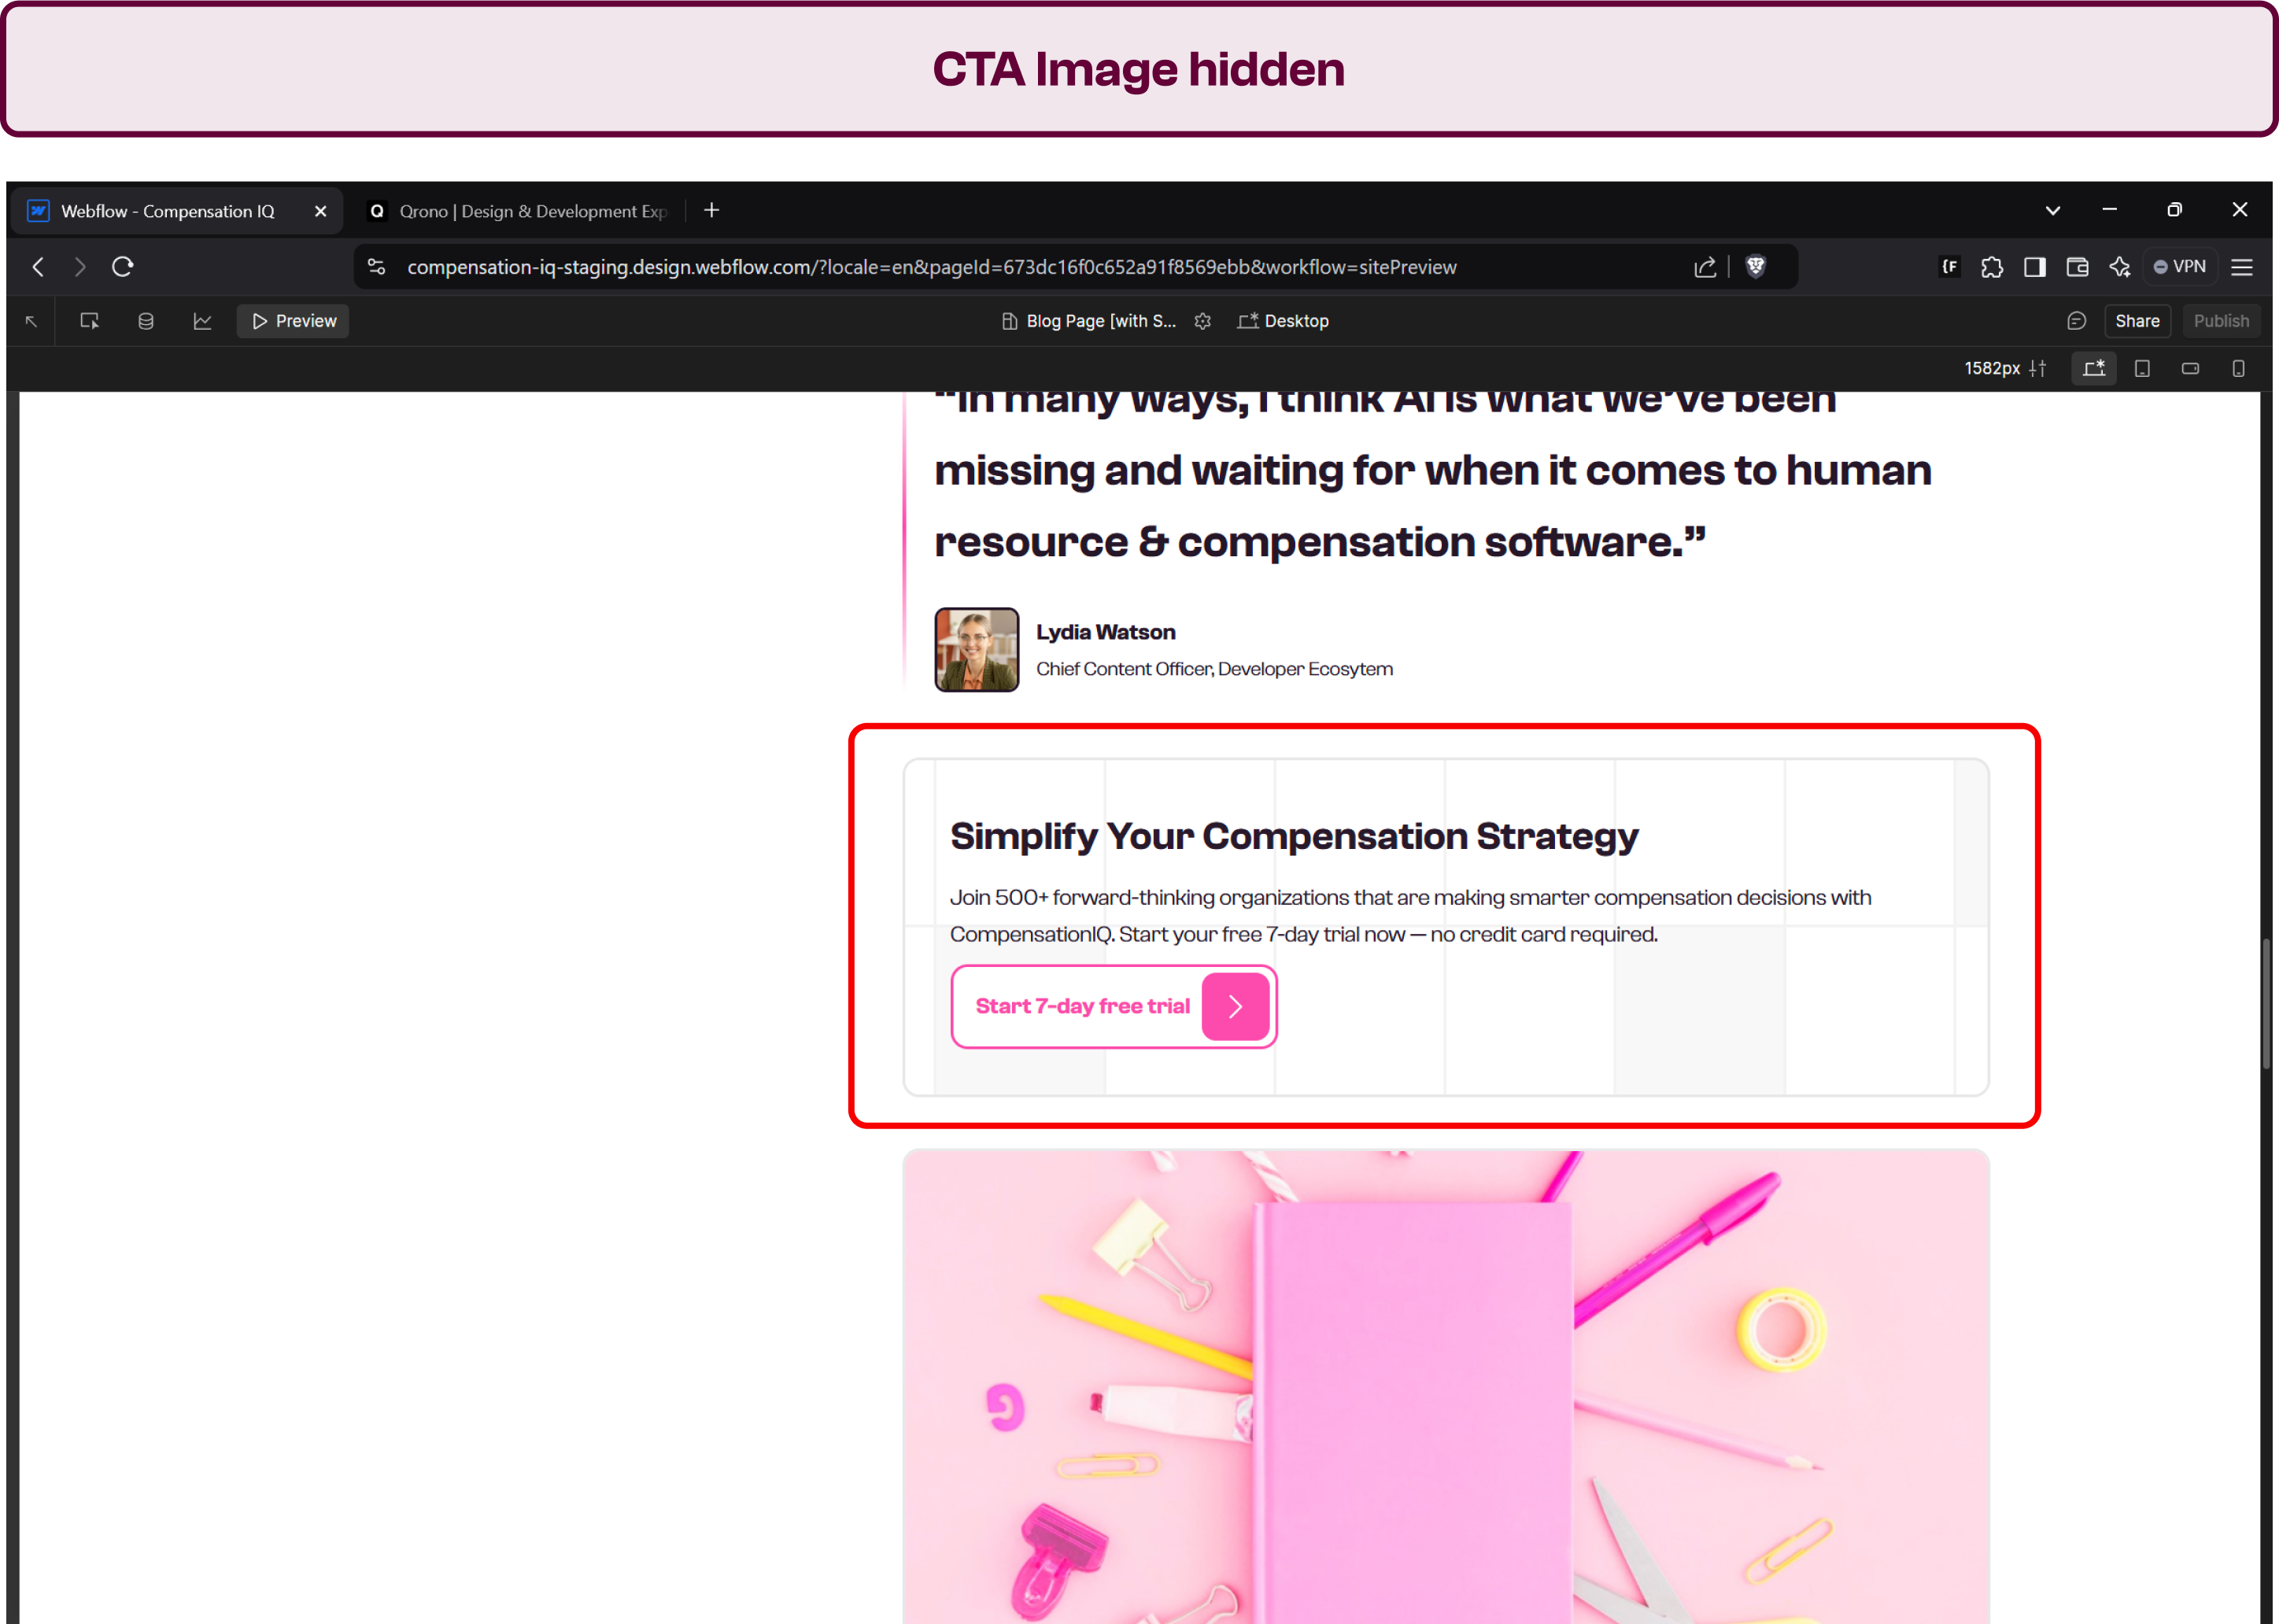
To make these components editable for individual pages, I also added component properties to each text and image field.
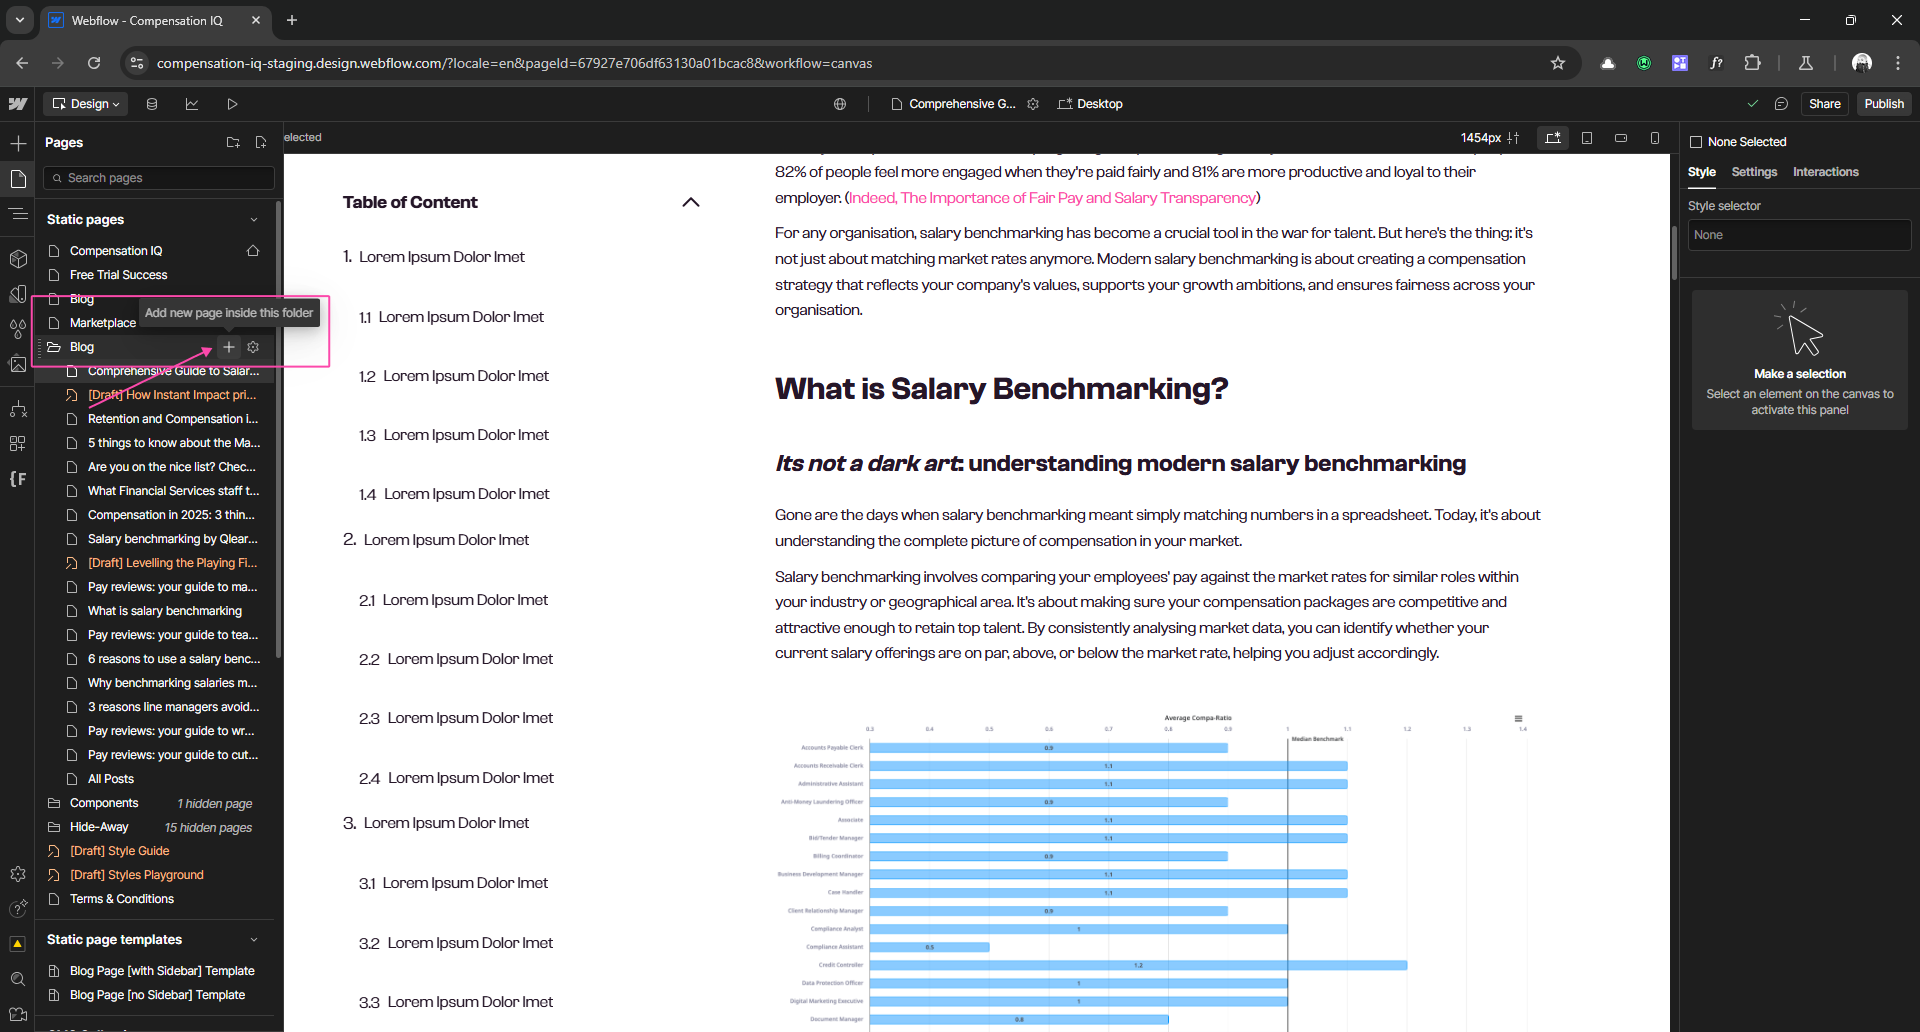
Step 4: Adding Flexibility with Page Slots
The main challenge was creating a reorderable content section for the body of each blog post. To achieve this, I used page slots in the content area of the template.
Page slots are blank containers styled to adapt to dynamic content. Here’s how I implemented them:
- Added a 100% width property to ensure they don’t collapse with smaller content.
- Styled the page slot to support various elements like images, text, and videos.
- Pre-filled this page slot with all the content components created. This way, every new page (i.e., duplicates of the blog post page template) includes these components by default, and then clients can simply drag, drop, reorder, or delete components they don't need using the left-hand navigator panel.
This feature allowed client's team to create unique layouts for individual posts without breaking the overall design system.

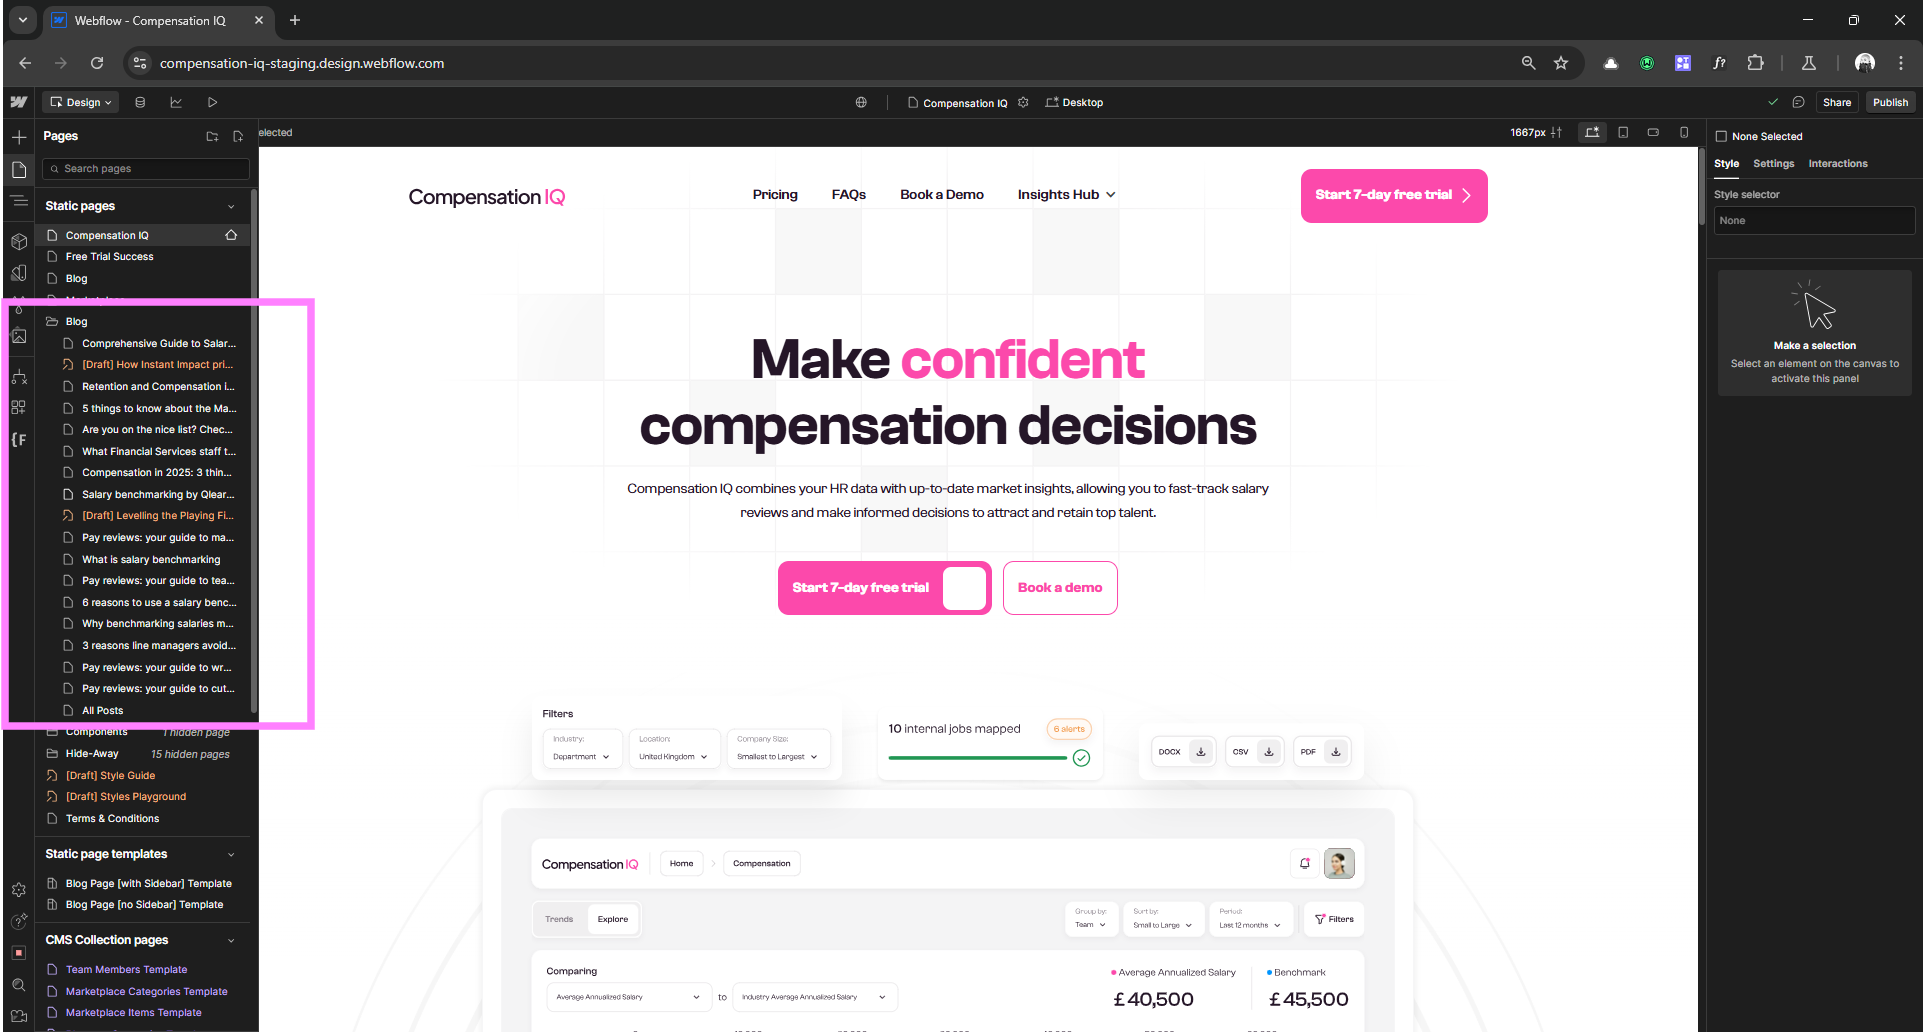
Step 5: Creating a Blog Folder
Finally, I created a Blog Folder to organize all blog pages under a single URL structure (e.g., /blog/newblogpage). This helps with SEO and user navigation.
How to setup the table of contents
Your setup is now complete. Next, we will walk through creating an example blog post with this setup.
However, before we proceed, I anticipate that there will be questions about how we set up the table of contents to automatically pull headings from the blog post and link to them. There is a bit of finesse involved in executing that, so we address that in a separate article here.
Now, let's proceed.
Putting It All Together: How to Create a Blog Post with this system
Now that I’ve covered the setup, let’s walk through creating a new blog post using this system.
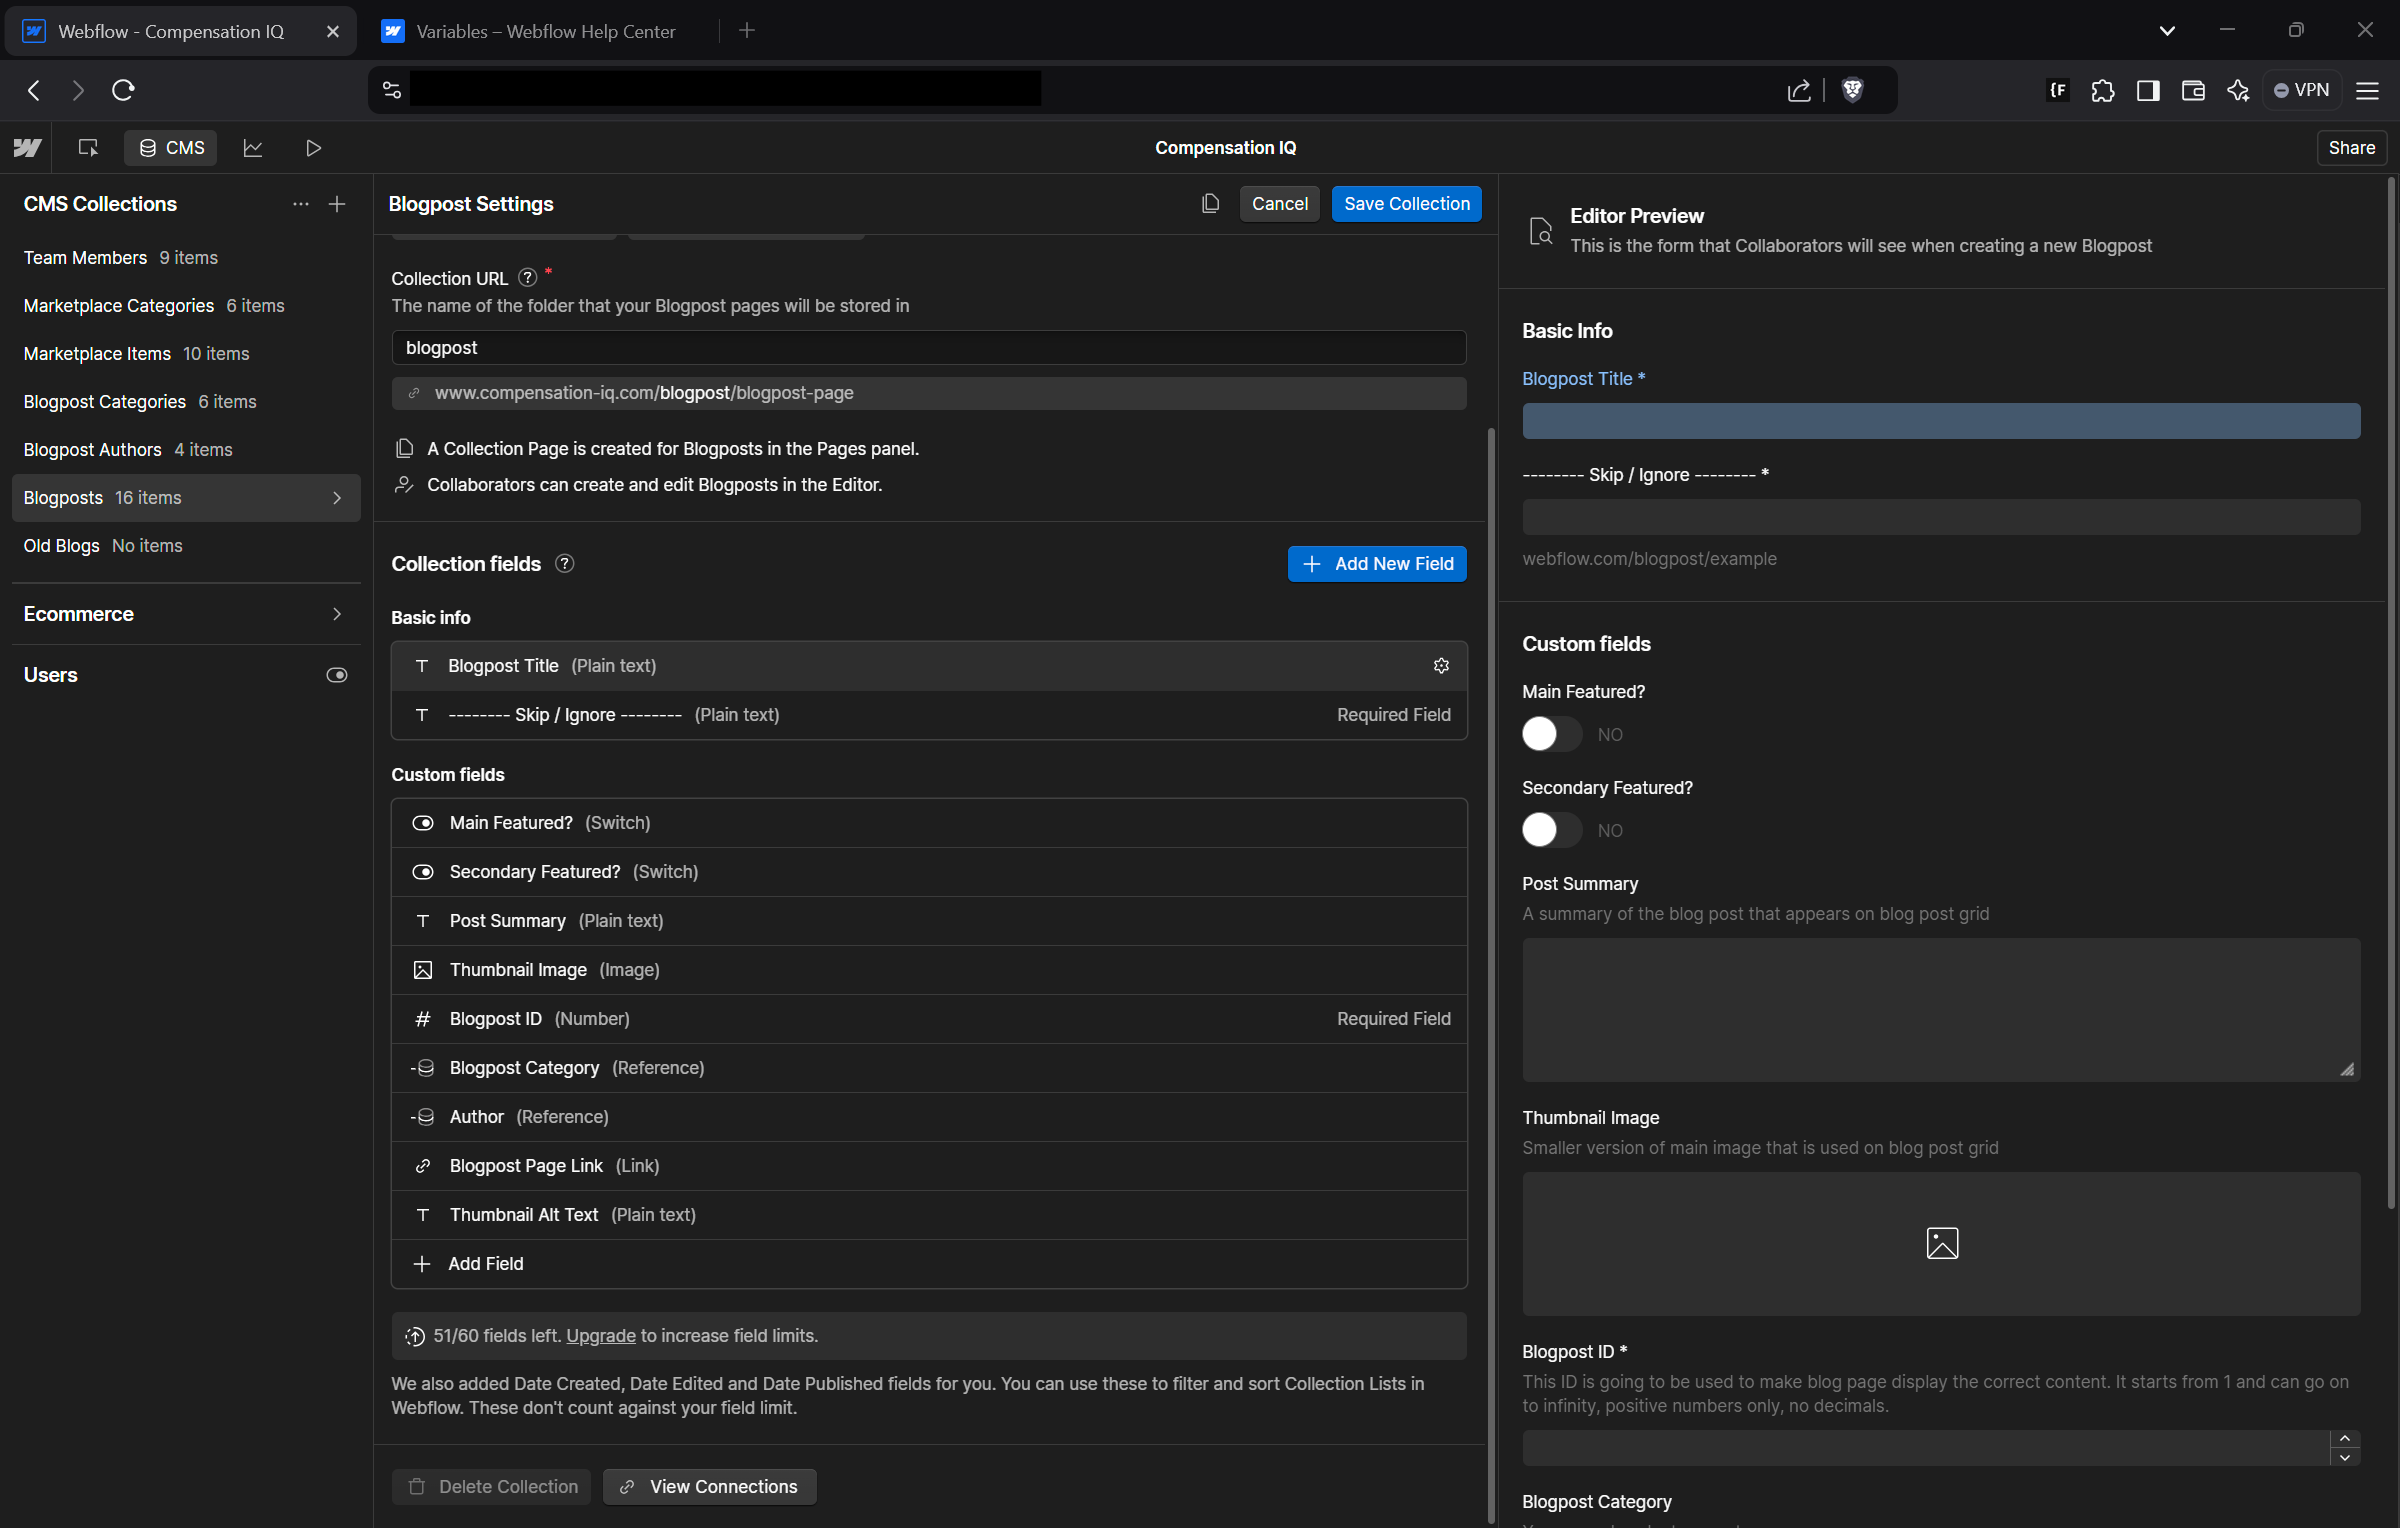
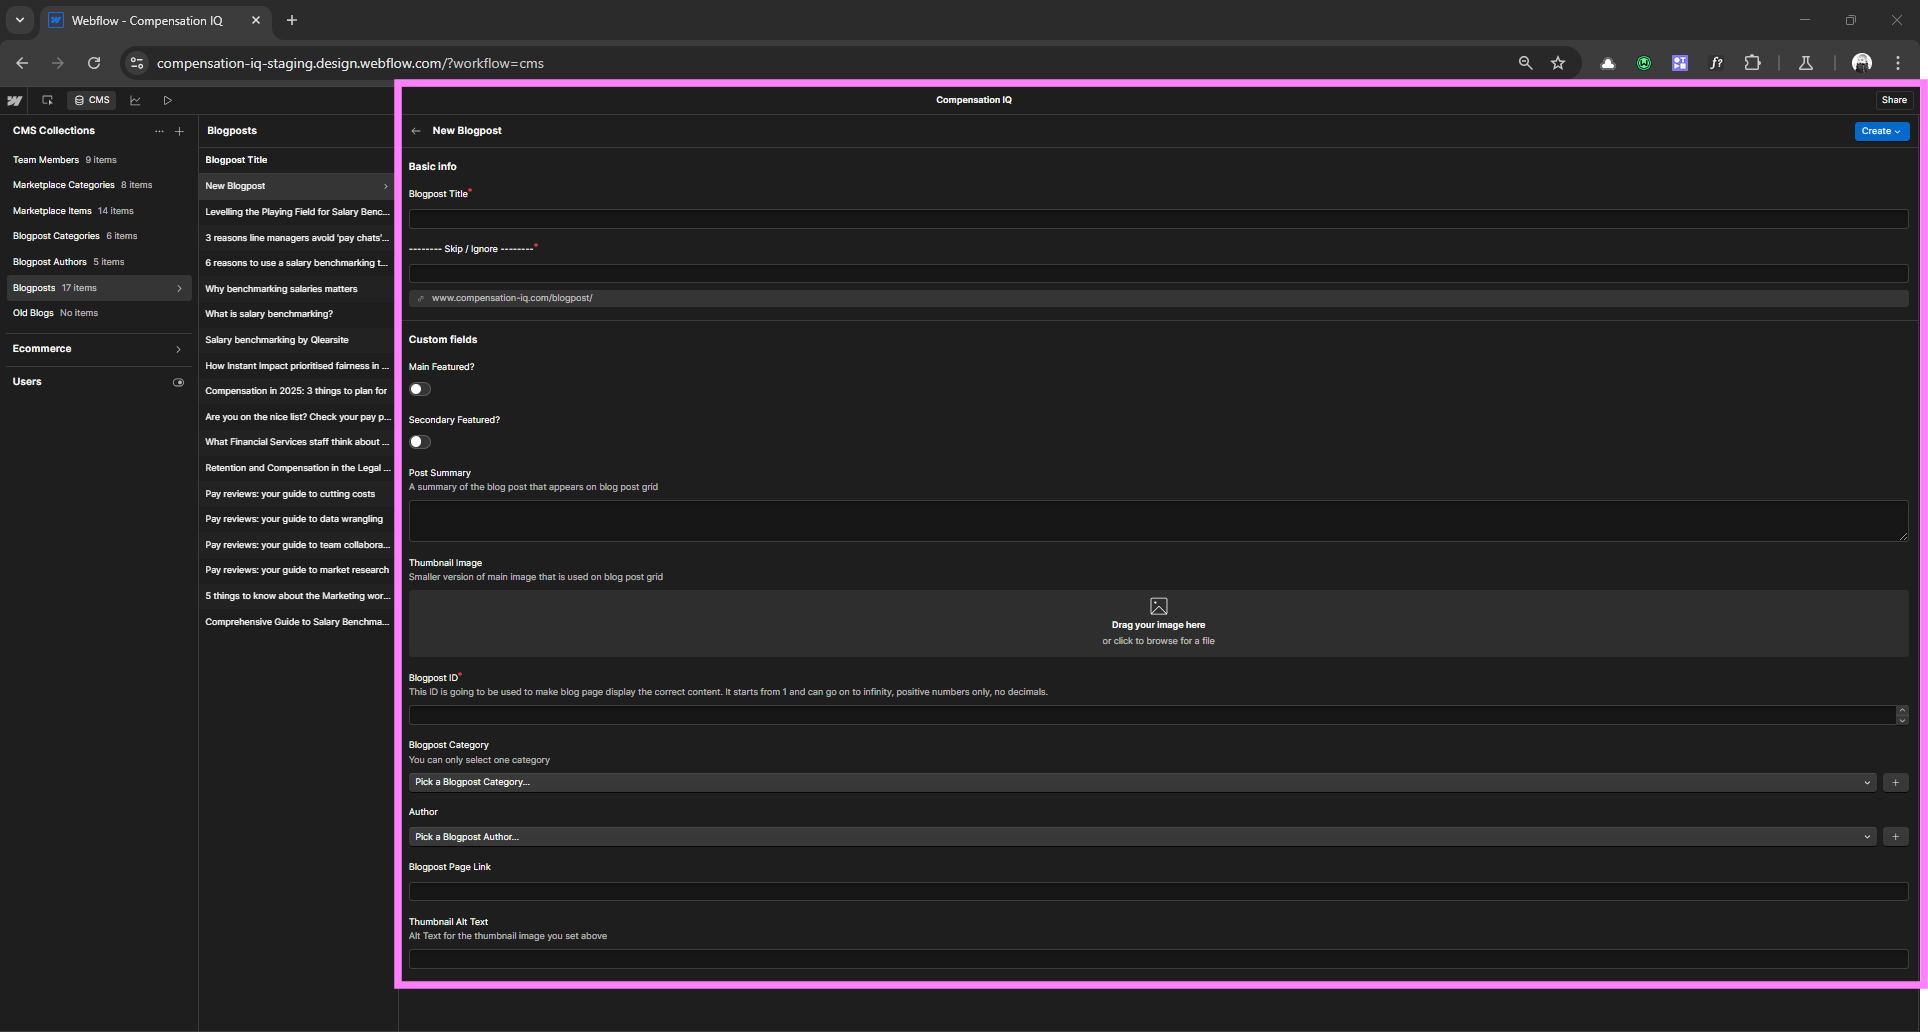
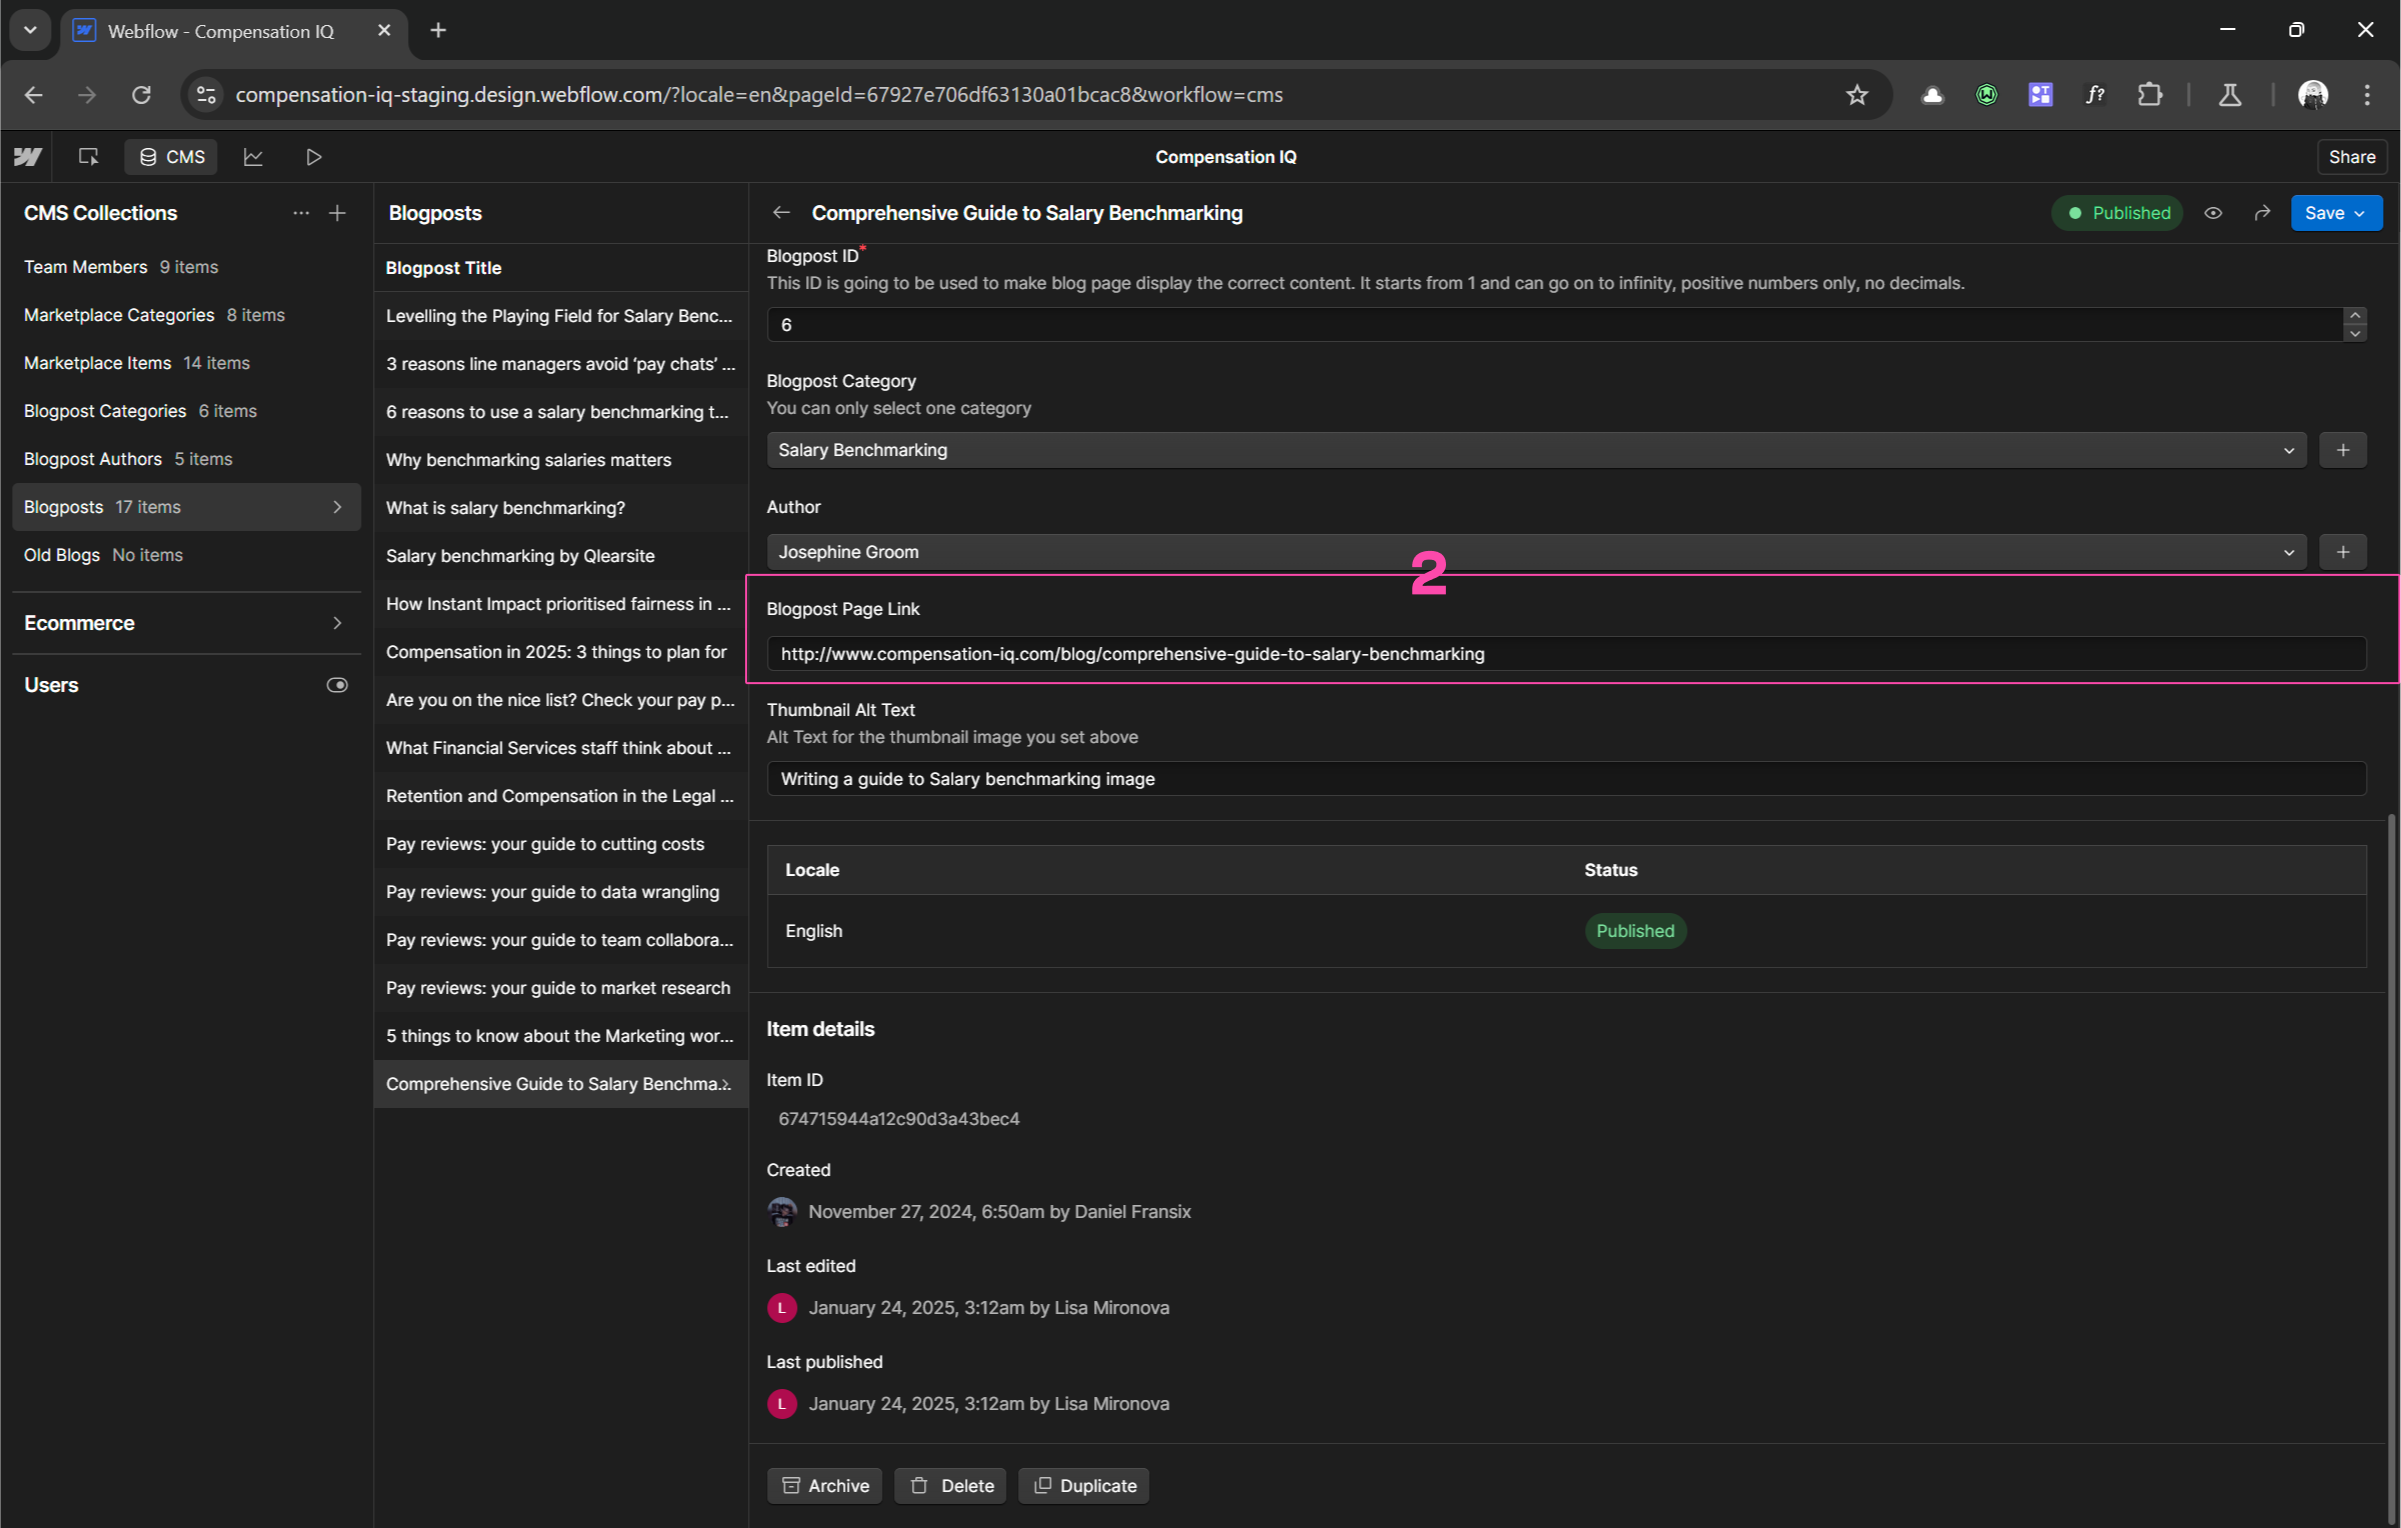
Step 1: Create the Blog Post in the CMS
- Navigate to the CMS in Webflow and open the Blog Posts Collection.
- Click New Blog Post and fill out the required fields: * Title: Enter the blog’s headline. * Summary: Provide a brief description. * Primary Image: Upload the featured image. * Blog Post ID: Assign a unique ID (e.g., 101). This is crucial for filtering later. * Leave the Blog Post Page Link blank for now.
- Save the post by clicking Create.

Step 2: Create a New Blog Page
- Go to the Pages section and click New Page.
- Choose the blog page template I designed earlier.
- Assign the new page to the Blog folder to ensure the correct URL format (e.g., /blog/newblogpage).
- Add placeholders for custom content in the page slots.
- Click Create to save the new page.
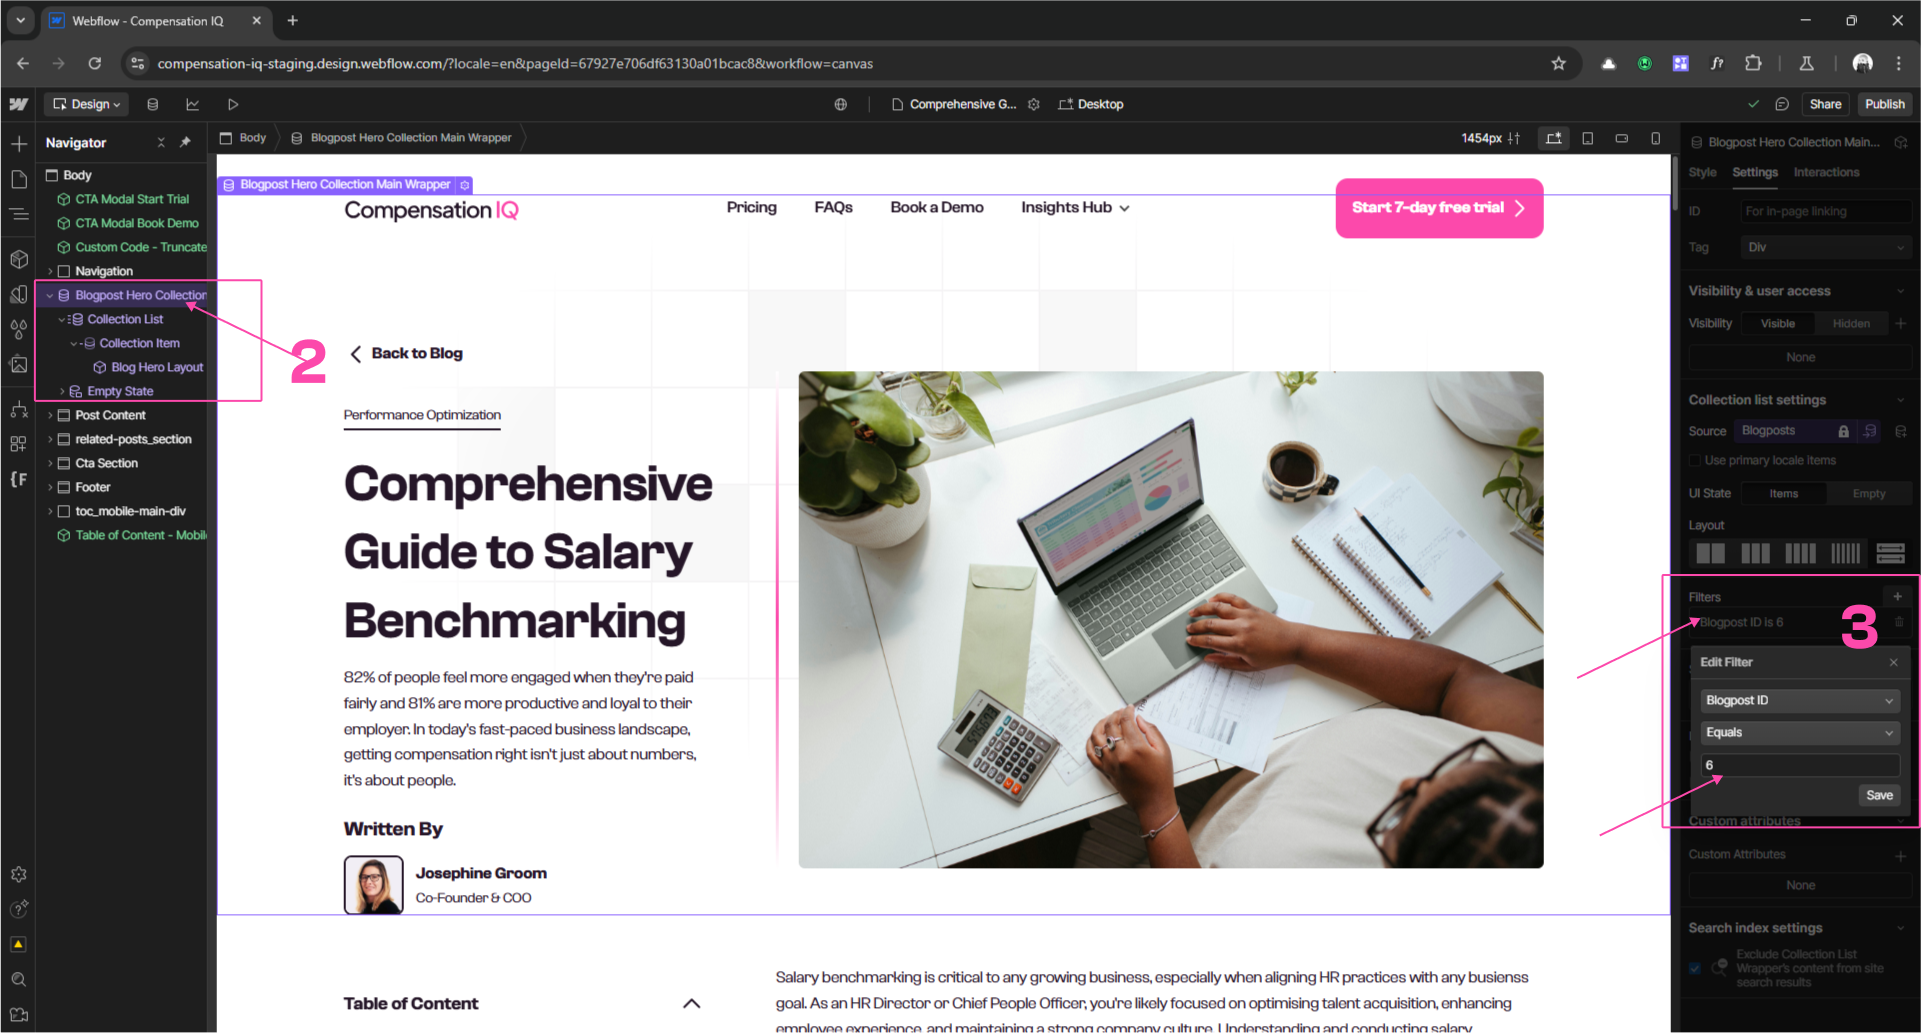
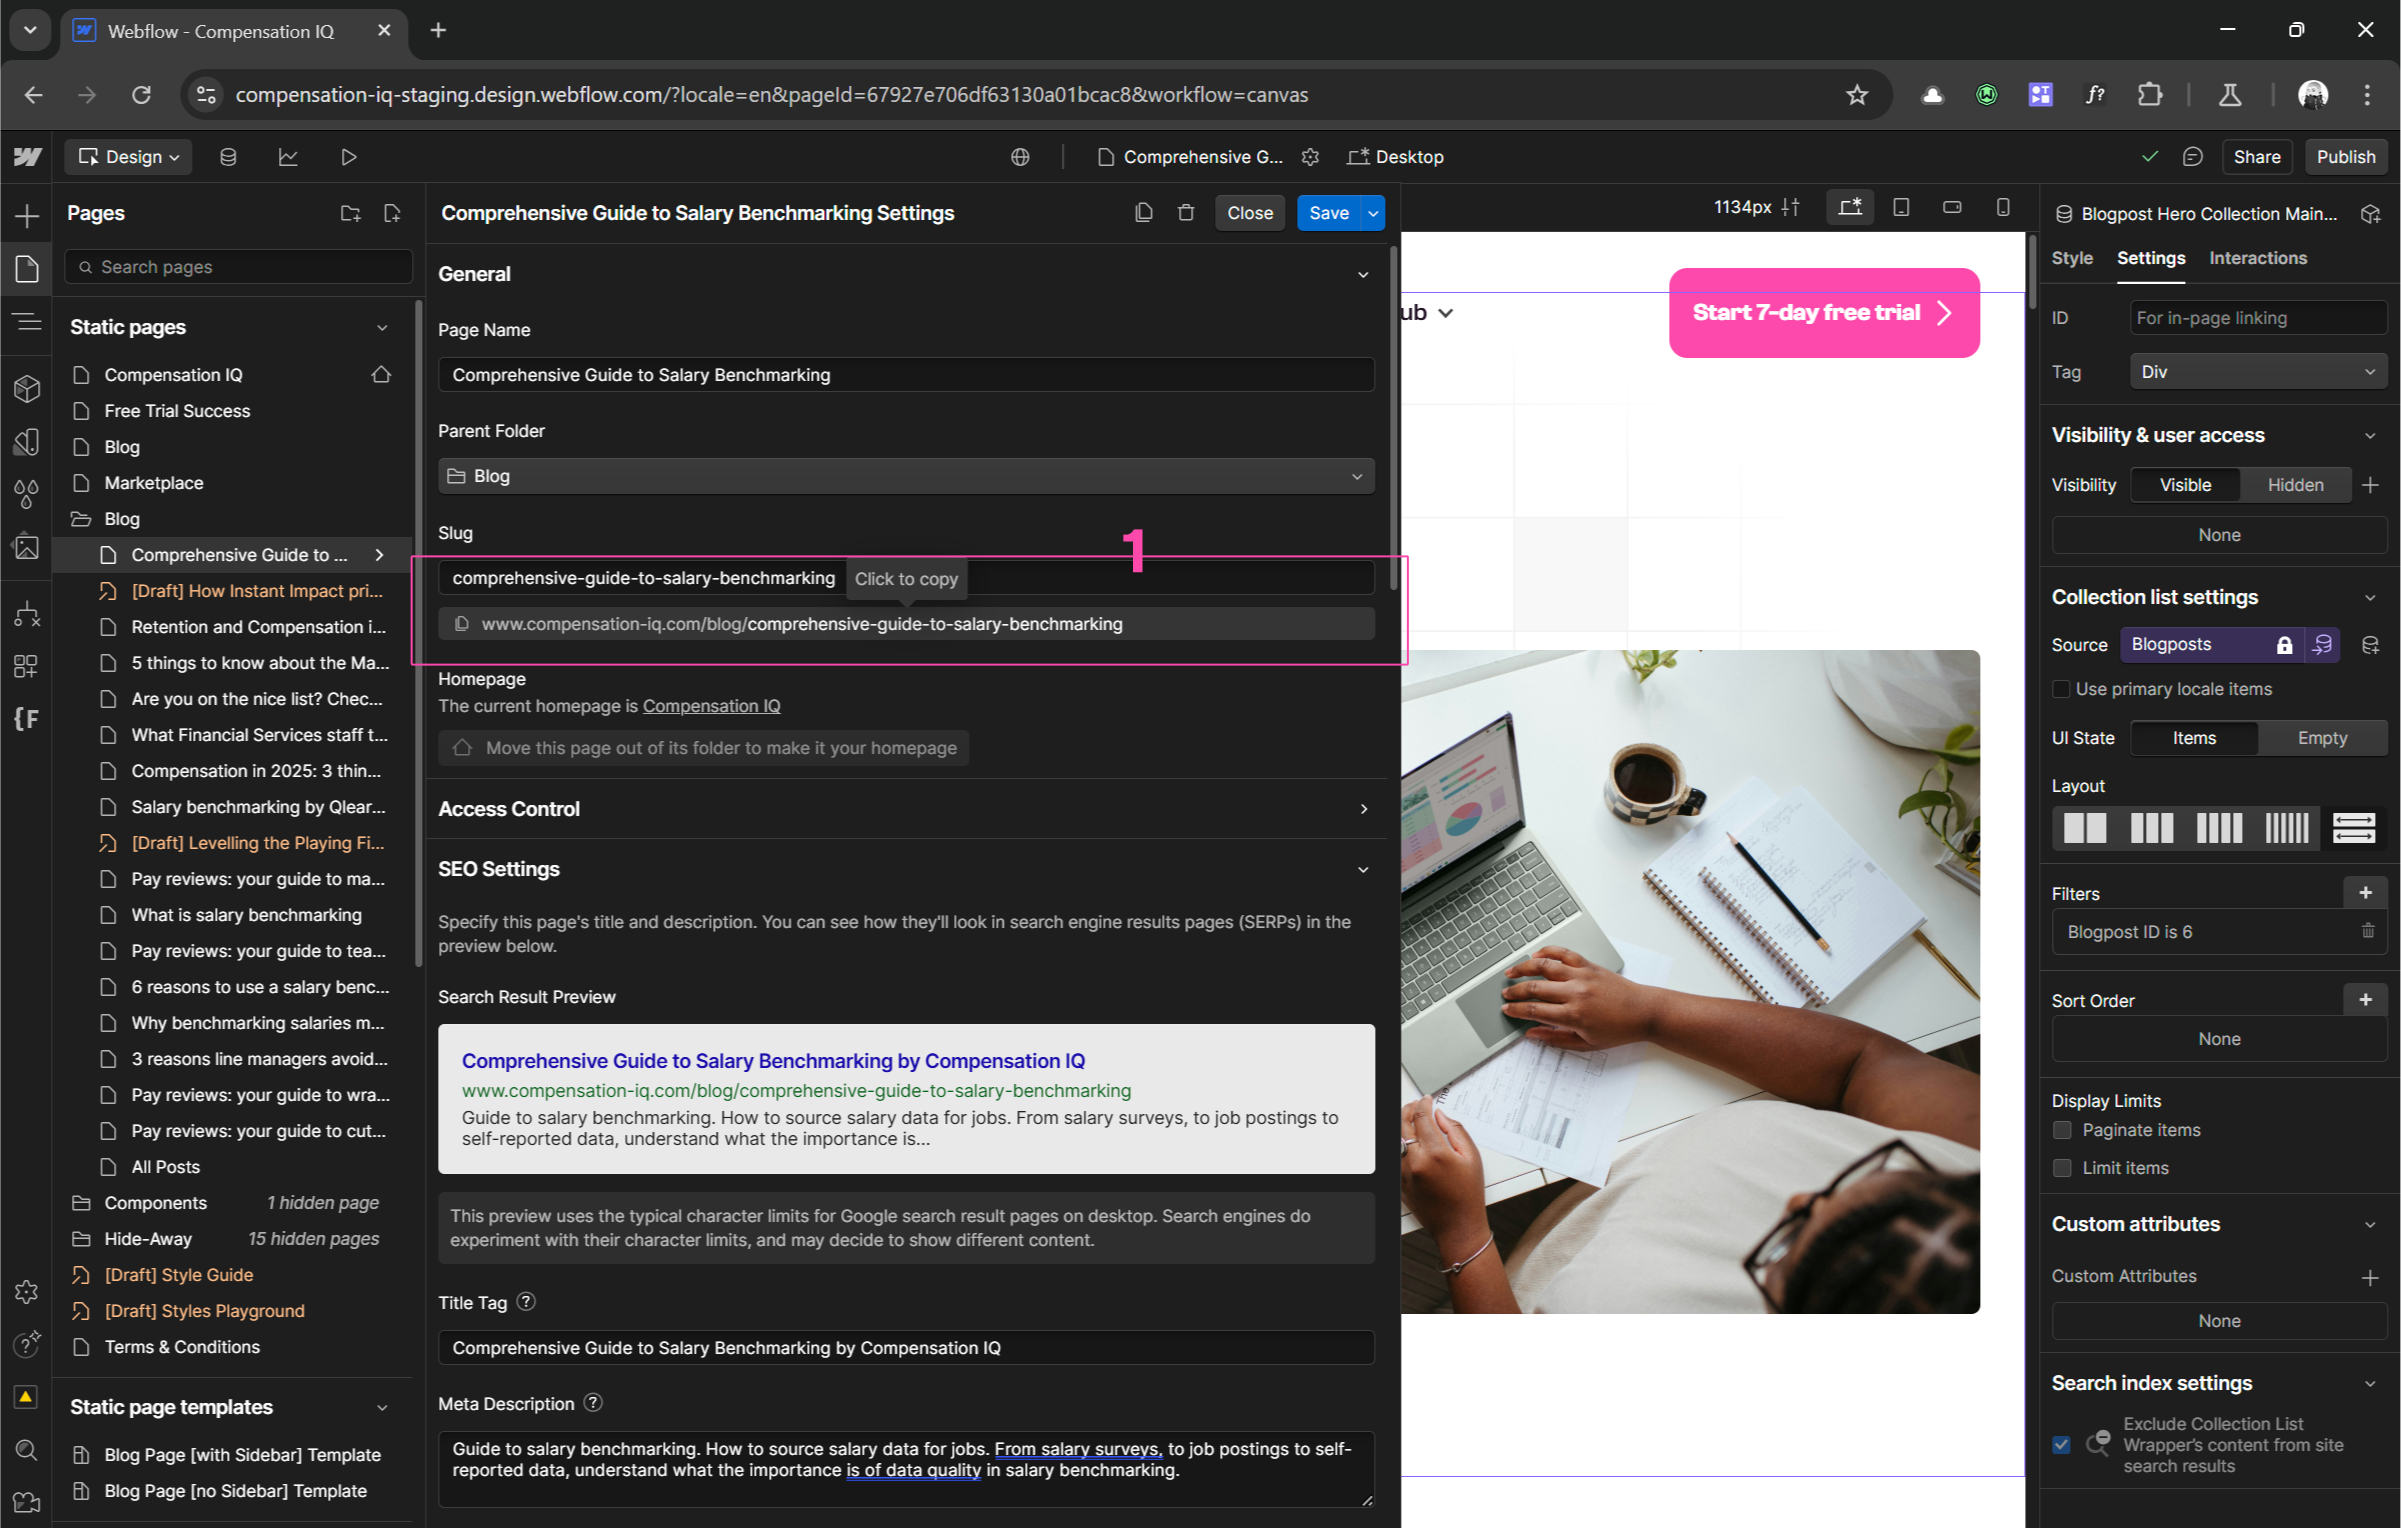
Step 3: Connect the Hero Section to the CMS
- Copy the unique Blog Post ID you assigned in the CMS.
- On the new page, select the hero section (highlighted as a purple element in the Designer panel).
- Go to the Settings tab in the right-hand panel and locate the Filters section.
- Add a filter to display content where the Blog Post ID matches the ID you copied earlier. This dynamically pulls in the blog title, summary, image, and other CMS data into the hero section.
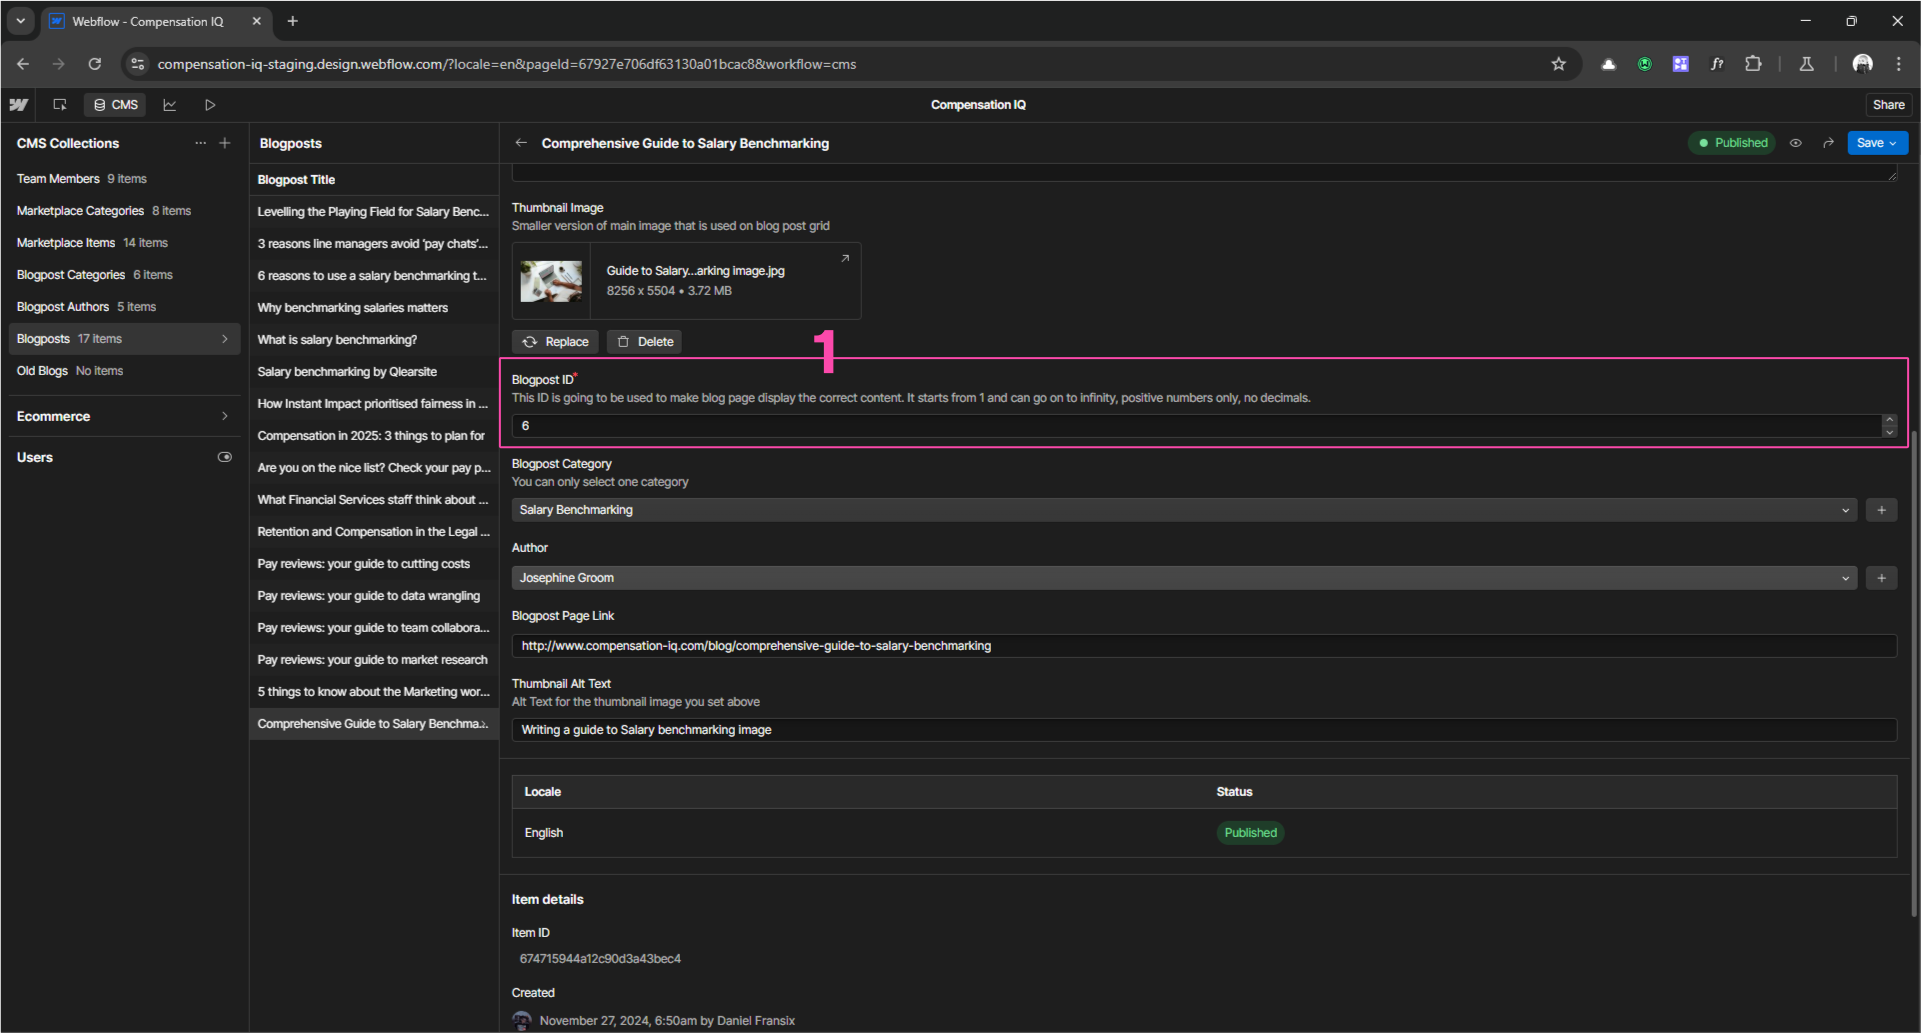
Step 4: Link the Page Back to the CMS
- Publish the page and copy its URL.
- Return to the CMS, find the corresponding blog post, and paste the URL into the Blog Post Page Link field.
- Save the post to establish the connection between the CMS and the blog page.
Step 5: Customize the Blog Content
- Use the page slots in the content section to add and rearrange elements as needed: * Drag in components like images, text, or quotes. * Adjust the order by moving things up and down to fit the unique layout of the post.
- Edit text directly by double-clicking to retain default styling.
- For dynamic elements like quotes or images, configure them in the right-hand panel to pull content from the CMS or use static placeholders.
Step 6: Final Checks
- Preview the blog page to ensure all dynamic content (e.g., title, images, related posts) is displaying correctly.
- Publish the site and test the navigation links to confirm everything works seamlessly.
Results and Takeaways
By combining Webflow’s CMS capabilities with custom design solutions, I delivered a blog that met client's needs for flexibility, ease of use, and aesthetic design. The new blog empowers their team to:
- Create dynamic, unique layouts for individual posts.
- Manage content efficiently using the CMS.
- Maintain a consistent, polished design across all pages.
Final Thoughts
This project was a great example of how Webflow’s flexibility can be extended with creative problem-solving. If you’re considering a similar setup or have questions about building dynamic blogs, feel free to reach out—I’d love to help!
If you have questions about any part of this article, you can reach me on daniel@qronolabs.com

.png)
6.png)

